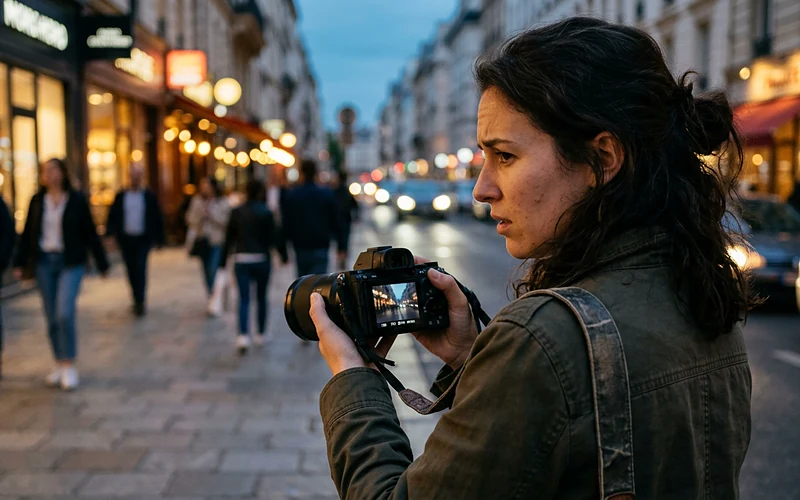
You caught the moment. The light was lovely, your friend was laughing, and the timing was perfect. Then you zoomed in on the back of the camera. Soft. A bit smeared, maybe. Or the background is crisp, and the one face that mattered isn’t.
If you’ve ever stared at a shot like that and wondered, “Why are my photos blurry?”, you’re in very normal company. Pretty much every photographer goes through it, usually more than once. Blur almost always has a cause you can name, though. Once you can name it, fixing it is mostly a habit.
This guide covers the 10 most common causes on cameras and phones, with a fix for each. Start with the quick diagnosis, because it saves a lot of guessing. And if blur is just one of several things holding your photos back, our guide on why your photography isn’t improving is a good next read.
Quick Answer: Why are my photos blurry? Usually it’s one of three things: the camera moved, your subject moved, or the focus landed on the wrong spot. To fix it, keep your shutter speed at 1/focal length or faster (1/250 or more for moving people), put a single focus point on your subject, and wipe your lens.

Table of contents
Why Are My Photos Blurry? A Quick Diagnosis
Before you touch a single setting, zoom in to 100%. The camera’s little screen is a bit of a liar, honestly. It shrinks everything so much that a pretty soft photo still looks fine on it. At full size, though, the blur gives itself away. It’ll almost always be one of three kinds, and each kind has its own fix.
Motion Blur
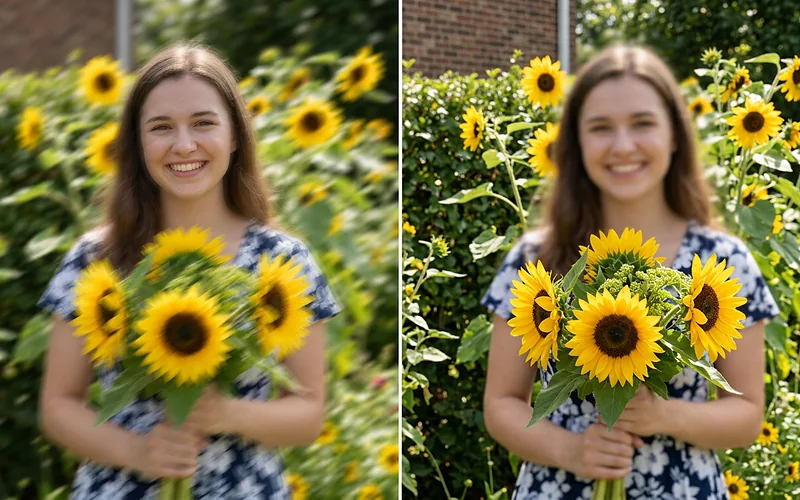
Look for streaks, or edges that seem to have a faint twin, like a ghost hanging next to a lamp post. If the whole frame smears in the same direction, your hands moved. If only the kid on the swing is smeared and the swing set is fine, the kid moved.
In both cases, your shutter speed wasn’t fast enough.
Missed Focus
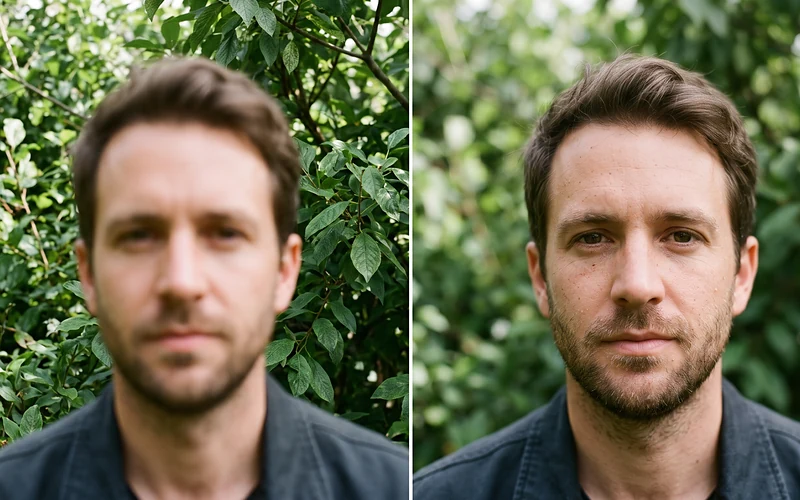
In this case, part of your photo is sharp – it’s just the wrong thing. The fence behind your friend and the leaves in the trees look crisp, but her face is a blur. That isn’t camera shake; your camera simply locked focus on the background instead of your subject.
Overall Softness
Nothing streaks, nothing is crisp. The whole image looks a bit hazy, like it was shot through a dirty window. Sometimes that’s literally the cause. A smudged lens, heavy noise reduction, or a lens pushed to its limits can all do this.
Once you know which one you’re dealing with, jump to the matching reasons below. Motion blur is mostly reasons 1 to 3, missed focus is 4 to 6, and softness lives in 7 to 10.
10 Reasons Your Photos Are Blurry (And How to Fix Them)
Work through these in order. The first few explain most blurry photos, so there’s a decent chance you won’t need to read all ten.
1. Slow Shutter Speed
This is the big one. Indoors in the evening, your camera might quietly pick 1/15 of a second to get enough light. Nobody can hold a camera still for that long. The result looks soft even when focus was spot on.
A classic rule of thumb works well here. Always match your minimum shutter speed to your lens’s focal length.
If you are shooting with a 50mm lens, stick to at least 1/50 second. If shooting on a crop sensor, multiply that focal length by 1.5 first. That means eaning that 50mm lens now needs around 1/80 second. If you’re using a high-megapixel camera, pad that speed even more, as higher-resolution sensors pick up every micro-shake.
The easiest fix is Auto ISO with a minimum shutter speed set in the menu. The camera raises ISO before it drops below your limit. Some grain is fine. Blur usually isn’t. If the room is just too dark, add light instead. A lamp moved closer does more than you’d think, and Frank Doorhof’s Lighting Setups That Always Work shows how to do a lot with very little gear. For the basics of reading a scene’s light, see our guide on how to read light in photography.

2. Camera Shake
Even with a fast shutter speed, a loose grip can ruin a sharp shot. Holding your camera out at arm’s length is usually the problem. Instead, rest your elbows on your ribs, support the lens from underneath with your left hand. Then anchor the viewfinder to your eyes.
Exhale slowly and roll your finger smoothly over the shutter button. If you’re in low light, lean against a wall or pillar, and fire off a quick three-shot burst—the middle frame is usually the sharpest since your hand has settled. It feels a bit deliberate at first, but within a week, it becomes second nature.
3. Moving Subjects
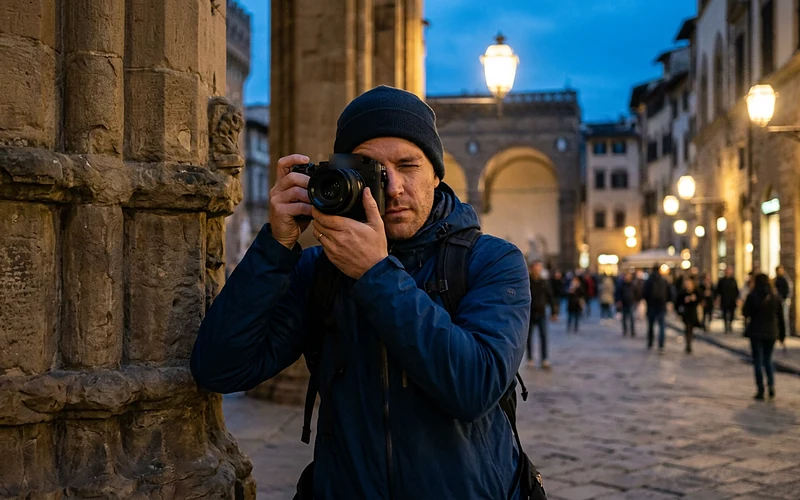
Even if your hands are steady, the photo still gets blurry because the subject moved. Kids, dogs, cyclists, and birds won’t hold a pose for you. You need a shutter speed adjusted to how fast they are moving. Here’s a short & easy guide:
| Subject | Shutter speed to start with |
| People walking | 1/250 |
| Kids and pets playing | 1/500 |
| Running, sports, cars | 1/1000 |
| Birds in flight | 1/2000 or faster |
Use Shutter Priority (S or Tv) so the camera keeps that speed and adjusts the rest. Burst mode helps too. Nick Dale’s Complete Wildlife Photography Tutorial covers setups for fast animals.

4. Wrong Focus Point
In automatic area mode, the camera picks what to focus on. It usually goes for whatever is closest or has the most contrast. That might be a shoulder, a branch, or the pattern on a shirt. Not the eyes.
Change to a single focus point and put it exactly where you want sharpness. For portraits, turn on eye detection if your camera has it. One more trap is “focus and recompose” at wide apertures like f/1.8. When you lock focus and then tilt the camera, the focus plane shifts a little, and an eye becomes an ear. Moving the focus point is safer than moving the camera. Ian Plant’s The Art of Creative Focus Photography goes deep on choosing what’s sharp and what isn’t.
5. Wrong Focus Mode
Most cameras feature two primary focus modes: Single and Continuous. Single (AF-S/ One Shot) locks focus on the target and holds it.
Continuous (AF-C or AI Servo) keeps re-adjusting as you half-press the shutter button. Use single for anything in a still position. Use continuous for anything moving toward or away from you.
If you shoot a child running at you in single mode, focus locks at the distance they were. By the time the shutter fires, they’re closer and soft. Plenty of photographers also move focus to a back button, so they can track with their thumb and shoot with their finger. It takes a day to get used to. Try it during a challenge week like the ones in our photography challenge ideas list.
6. Shallow Depth of Field
A wide aperture like f/1.8 gives that dreamy blurred background everyone loves. The catch is how thin the sharp zone gets. Shoot a portrait at f/1.8 from about a meter away and only a few centimeters are truly sharp. Eyes in, nose tip out.
That’s lovely for one face. It’s a problem for three friends sitting at different distances around a table, where one is sharp, and the others aren’t. For groups, close the aperture to f/5.6 or f/8. For landscapes, try f/8 to f/11 and focus roughly a third of the way into the scene.
If you like building scenes in layers, with something in the foreground, your subject in the middle and a busy street behind, Alex Coghe’s Street Photography Composition Guideshows how to make each layer earn its place.

7. Low Light and High ISO
Dark scenes push your camera to high ISO, and high ISO brings noise. To hide that noise, the camera (or phone) smooths the image. Fine texture like hair, fabric, or grass gets wiped away with it. The photo isn’t blurred by movement, but it reads as soft.
Shoot in RAW, so you can control noise reduction later.
Also, AI denoise tools in Lightroom are great at keeping detail. The Lightroom Workflow learning path walks through the editing side.
8. Dirty or Foggy Lens
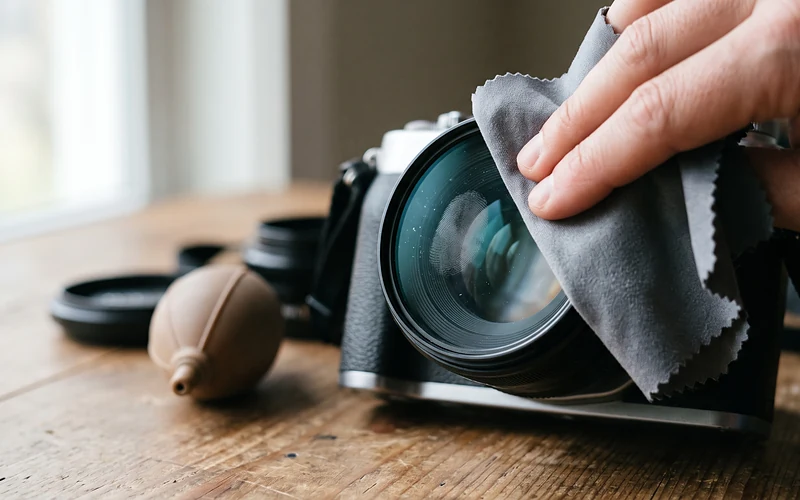
Honestly, check this one first. It takes five seconds. A fingerprint or a bit of sunscreen on the front glass gives a hazy, low-contrast glow, especially around bright lights. Phone lenses are worse because they live in pockets.
Humidity catches people out too. Step from an air-conditioned room into warm, humid air and the lens fogs over instantly. Keep the camera in its bag for 15 to 20 minutes so it can warm up slowly. Carry a microfiber cloth and a blower, and be a bit suspicious of very cheap UV filters, since some soften the image more than you’d expect.
9. Lens Softness and Diffraction
Every lens has a sweet spot. Most are a little soft wide open, especially in the corners, and get noticeably crisper two or three stops down. That’s often around f/5.6 to f/8. Kit zooms also tend to be softest at their longest focal length.
Go the other way, past f/16, and a different problem kicks in. Light bends around the small aperture opening. That’s diffraction, and it softens the whole frame. So if a landscape looks oddly mushy at f/22, that’s probably why. Stay around f/8 to f/11 unless you really need more depth. The Landscape & Travel learning path covers this kind of trade-off in the field.
10. Tripod and Stabilization Mistakes
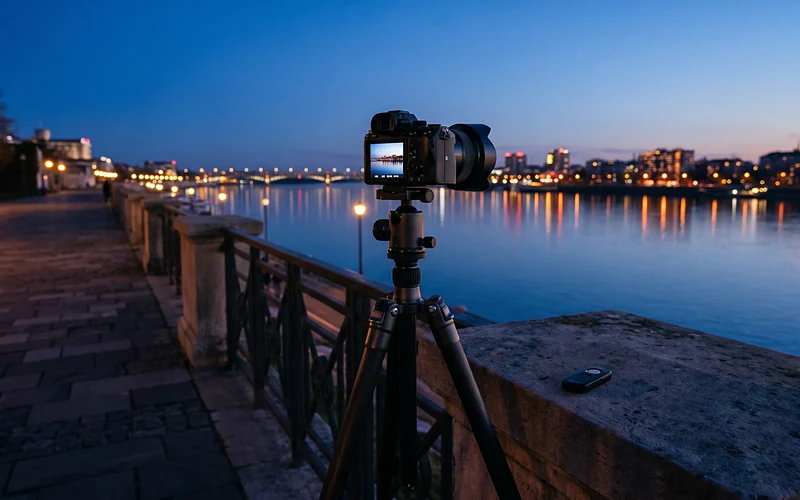
A tripod should fix the camera shake problem, right? Mostly. But pressing the shutter button can still nudge the camera during a long exposure. Use the 2-second self-timer or a remote release so your hand is gone before the shutter opens.
Check your lens manual about image stabilization too. Some older stabilized lenses can actually add blur on a tripod while they hunt for movement that isn’t there, so turn IS off when locked down. Keep the center column low, and shield the setup from wind if you can.
If you’re your own subject, Teri Hofford’s Self Portrait Photography Course is worth a glance when you’re shooting yourself with a timer or remote.
Why Are My Photos Blurry on My Phone?
Phones hide a lot of their settings, so the causes look a little different. Start by wiping the lens on your T-shirt or a soft cloth. Seriously. That alone fixes a surprising number of “why are my pictures blurry” moments.
After that, check these:
- Zooming past the real lens. If your phone has a 2x or 3x lens, anything beyond that is digital zoom, which just crops and stretches pixels. Walk closer instead.
- Focus on the wrong thing. Tap your subject on the screen. On most phones, a long press locks focus and exposure so they don’t jump around.
- Night mode movement. Night mode keeps the shutter open for a few seconds. Brace your elbows on a table or wall and hold still until it finishes.
- Moving subjects indoors. In dim rooms, phones slow the shutter right down. Move near a window, or use burst or action mode for kids and pets.
- Portrait mode edges. The fake background blur sometimes eats hair or glasses. That’s software, not you. Step back a little or switch to the normal photo mode.
If your phone keeps hitting its limits, our guide to the best camera for beginners can help you decide when it’s time to upgrade.

How to Take Sharper Photos: A Quick Checklist
Before an important shot, run through this checklist. It takes about just 10 seconds once it’s a habit.
- Clean lens? Wipe the front glass with a microfiber cloth.
- Fast shutter speed? Make sure it matches both your focal length and how fast your subject is moving.
- Precise focus? Place your focus point directly on the subject’s eyes or main feature.
- Correct focus mode? Single AF for still subjects; continuous AF for anything in motion.
- Sufficient depth of field? Stop down your aperture enough to keep everything in focus.
- Solid posture? Tuck your elbows in, brace your grip, or lean against a support.
- Verify at 100%: Fire off two or three frames, then zoom all the way in on your screen to review.
The final check is what most photographers skip. Reviewing the shots gives you a chance to reshoot before the moment passes. If you want structured practice on all of this, the Core & Creative Skills learning path builds these habits step by step.
How to Fix Blurry Photos in Editing
Let’s be straight about this. Editing can rescue a slightly soft photo. It can’t turn a badly missed shot into a sharp one. Strong motion blur, especially, is very hard to undo.
For mild softness, Lightroom’s Detail panel is the place to start. Raise Amount to around 40 to 70 and keep Radius near 1. Then hold Alt (Option on a Mac) while dragging the Masking slider. The white areas get sharpened, and the black areas don’t, so you sharpen edges without making skies and skin crunchy. In Photoshop, you can sharpen just the eyes with a mask. Understanding The Power of Masks In Photoshop explains how masks work.
A few more tips:
- AI sharpening and deblur tools can recover mild blur, but check the result at 100%. They sometimes invent texture that wasn’t there.
- Sharpen last, after noise reduction, or you’ll sharpen the noise too.
- Export at the size you’ll actually use. Instagram, for example, resizes big files and recompresses them, which can soften fine detail. Exporting at 1080 pixels wide plus light output sharpening usually holds up better.
Dan Hecho’s New Lightroom Features Workflow is a good walkthrough of the newer editing tools.

Conclusion
So, why are your photos blurry? Usually it’s one of a handful of things: a shutter speed that’s too slow, a focus point in the wrong place, or a lens that needs a wipe. Zoom in, figure out which type of blur you’ve got, and fix that one thing. You don’t need a new camera for any of it.
The real transition happens when these checks become second nature.
You stop evaluating the sharpness of the shot and start thinking about the picture. Once your shots are sharp, the next step is learning to judge them honestly.
If you want feedback from other photographers along the way, the PhotoWhoa Studio community is a friendly place to share your work.
Frequently Asked Questions
1. Why Are My Photos Blurry When I Zoom In?
Ans. Small screens hide blur, so a photo can look fine until you zoom in. If it looks soft up close, check shutter speed and focus point first.
2. Why Do My Pictures Look Blurry Even When I Focused?
Ans. The camera may have focused on something next to your subject, or the subject moved after focus locked. Look for what is sharp in the frame. If it’s the background, use a single focus point. If nothing is sharp, your shutter speed was probably too slow.
3. What Shutter Speed Stops Blurry Photos?
Ans. For handheld shots of still subjects, use at least 1 over your focal length, so 1/50 on a 50mm lens. For moving subjects, start at 1/250 for walking people and 1/500 or faster for kids, pets, and sports.
4. Why Are My Photos Clicked At Night Blurry?
Ans. In the dark, your camera slows the shutter to collect enough light, and that magnifies every tiny movement. Raise your ISO, use a wider aperture, or put the camera on a tripod with a 2-second timer.
5. Can You Fix a blurred picture?
Ans. You can improve a slightly soft photo with sharpening or AI tools. Heavy motion blur or badly missed focus usually can’t be fixed convincingly. It’s much easier to get it right in camera.
6. Why Do My Photos Look Sharp on Camera but Blurred Out on the Computer?
Ans. The camera’s rear screen is small and shrinks the image, which hides blur. A computer monitor shows far more detail. Zoom into your photos on the camera before you leave the scene to catch problems early.
7. Why Do My Photos On Instagram Look Blurred Out?
Ans. Instagram resizes and compresses all uploads, which softens the details. Export at around 1080 pixels wide, including light sharpening. Also, avoid uploading large files or screenshots of photos.
8. Does a Tripod Make Photos Sharper?
Ans. Yes, for still subjects in low light or long exposures. Use a remote or self-timer so pressing the button doesn’t shake the camera. A tripod won’t help with a moving subject, though. For that, you need a faster shutter speed.
9. Which Aperture Gives the Sharpest Photos?
Ans. Most lenses are sharpest two or three stops down from their widest aperture, often around f/5.6 to f/8. Beyond about f/16, diffraction starts to soften the whole image.
10. Is a Blur Photo Always a Mistake?
Ans. Not at all. Intentional blur, like silky waterfalls, panning shots, or a dreamy background, can make a photo. The difference is control. Blur works when you choose it, and the important part of the image is still clear.