A great photo is not just about having an expensive camera. It’s about knowing where to place your subject and how to guide the viewer’s eye through the frame. That’s exactly why composition matters. And among all photography composition techniques, the rule of thirds is one of the easiest and most powerful to learn. Once you understand it, your photos can instantly start looking more balanced, professional, and visually striking.

Table of contents
What is the Rule of Thirds?
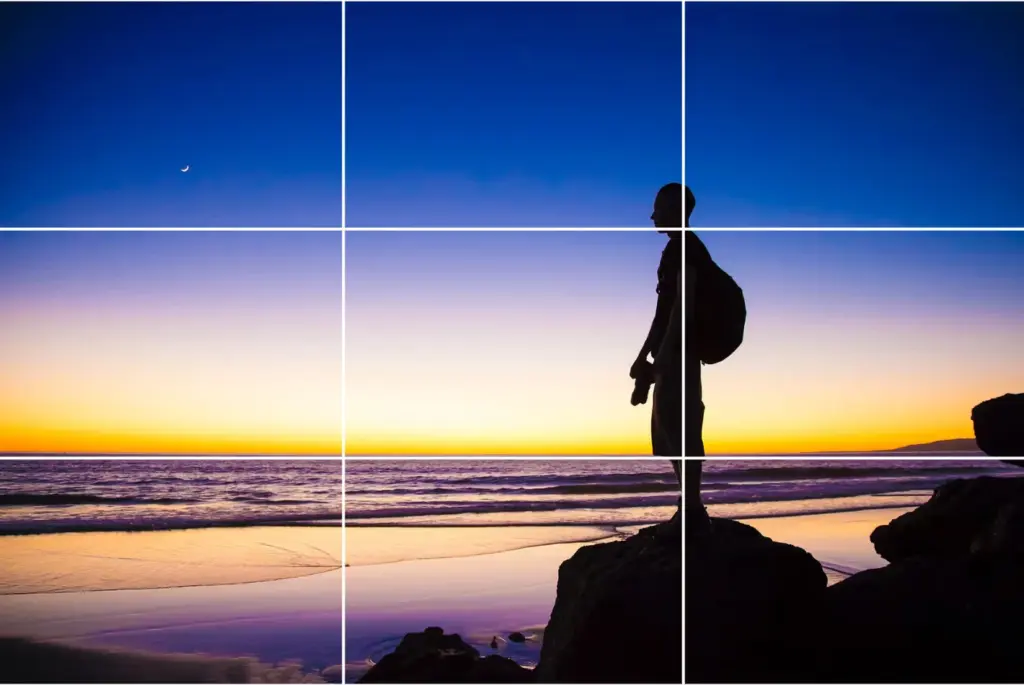
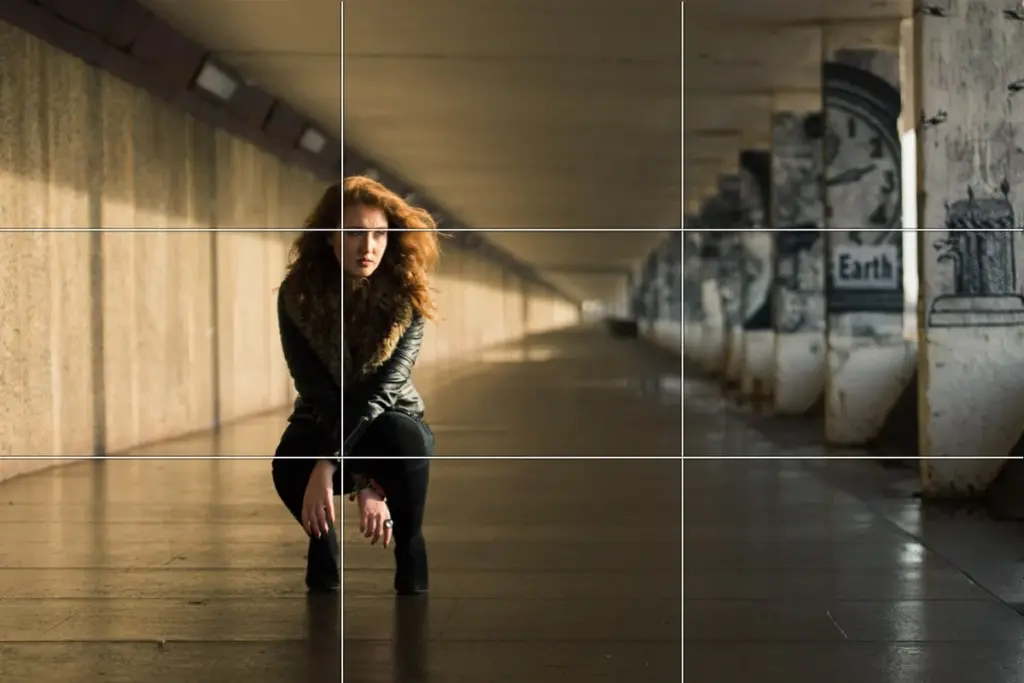
Place a grid, two vertical and two horizontal lines, splitting your frame into nine equal halves when you look through your camera. Photographers refer to that as the composition grid.
The concept is straightforward: place your subject along one of these lines or at the intersections of the lines rather than in the dead center. Everything changes with one small alteration.
For example:
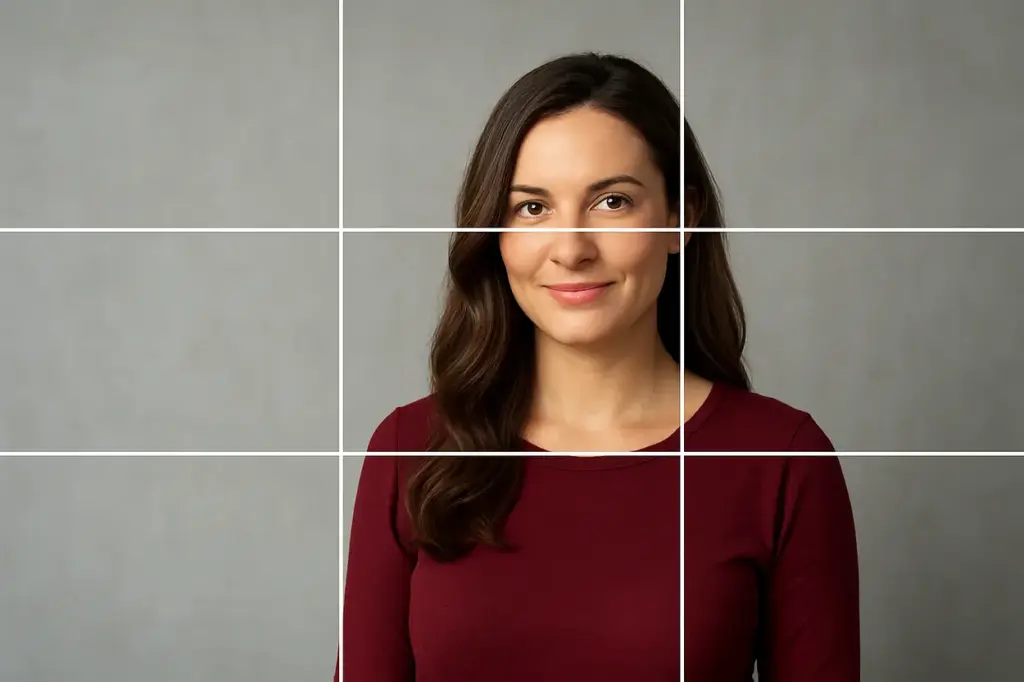
- When the eyes are positioned on the upper horizontal line, the portrait appears more realistic.
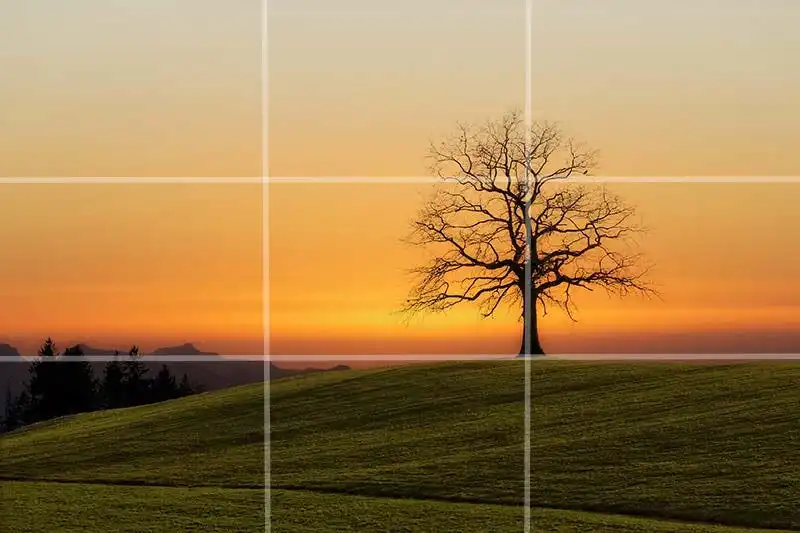
- When the horizon is at the bottom third of the frame rather than slicing it in half, the landscape appears more dramatic.
For photographers, the rule of thirds is similar to training wheels. You’ll see how quickly your images start to appear more appealing and balanced after you give it a try.
Curious which photography style suits you best? Explore portrait photography vs landscape photography to discover their unique creative appeal.
The Science Behind Why It Works
Why does it feel so natural to follow this rule? The way our eyes examine images holds the key to the solution. It is not in our nature to stare at the precise center. Rather, our focus veers a little off course. This innate inclination is exploited by the rule of thirds.
The image may appear flat or motionless if your subject is positioned in the center. The image appears to be motionless and frozen. The subject is moved off-center to create movement and fluidity. Instead of lingering in one spot, the viewer’s gaze moves throughout the image.
Consider going to the movies. It would be monotonous if each performer always stood in the center of the screen. This also holds true for still photography. The rule of thirds creates a visual path for the viewer, which makes the photo feel alive.
Looking to create cleaner and more impactful photos? Explore these minimalist photography ideas and techniques for powerful visual storytelling.
How to Apply the Rule of Thirds in Photography
This rule’s greatest feature is how simple it is to apply. You may activate the grid feature in your settings on the majority of contemporary cameras and even smartphones. The 3×3 grid will appear each time you frame a picture once it is enabled.
Here are some examples of how to use it:
1) Portraits:
Focus the subject’s gaze on the top third of the line. This small change gives the portrait a stronger, more captivating sense. Align the face with one of the vertical lines while taking a side profile, and leave some room in front of the subject’s gaze.
Ever wondered whether photography is creative expression or technical skill? Explore photography as art or science in this thought-provoking guide.
2) Landscapes:
Place the horizon on the top or bottom line of the image rather than cutting it in half. This aids in determining what you wish to highlight. Do you wish to draw attention to a striking, cloud-filled sky? Reduce the horizon. Do you wish to display more land or sea? Put it higher.
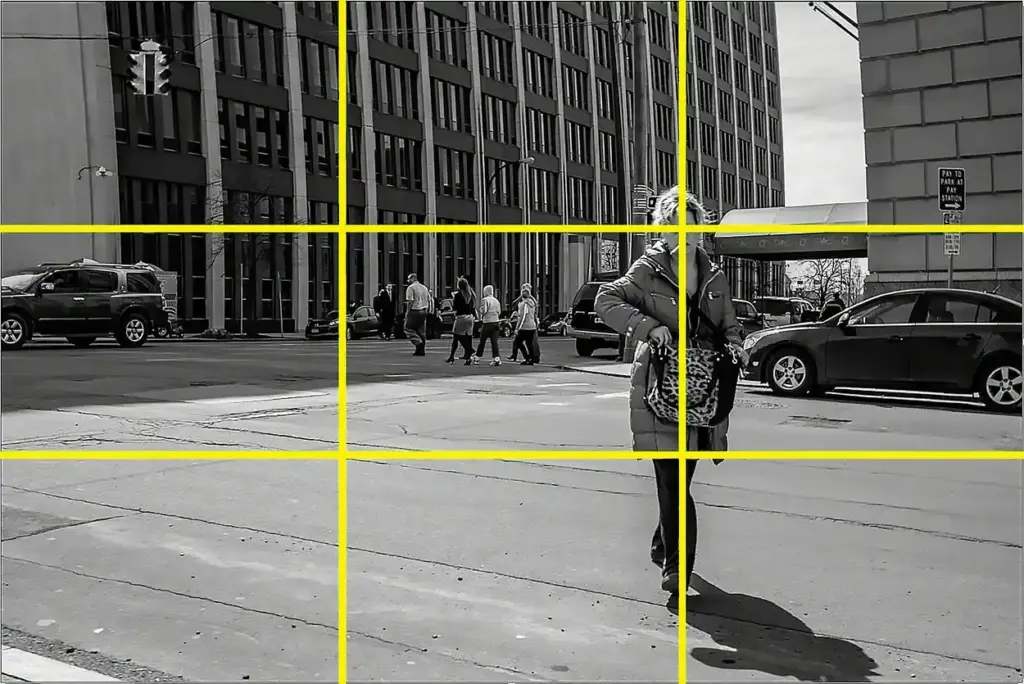
3) Street or Action Photography:
Place them in a single vertical line if they are running, riding, or walking, and provide room in front of them. This increases vigor, focus, and excitement. The person appears poised to advance into the picture.
Looking to improve your composition skills? Browse this guide on photography balance techniques for better framing.
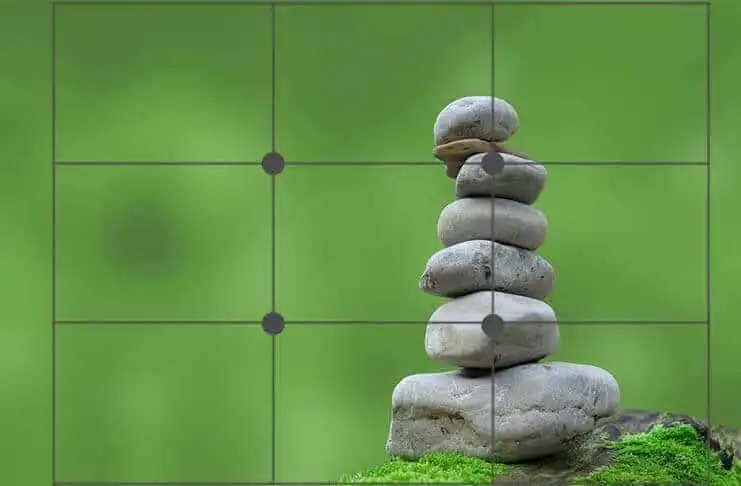
4) Still Life or Products:
When it comes to objects, try positioning the focal point at one of the four intersections. Then balance the remaining items along the other lines. This gives the frame a satisfying balance without appearing cluttered.
Tip: Don’t stress if you don’t get the ideal shot location. Later in the editing process, you may always crop the image to make it more in line with the rule.
Example of Rule of Thirds in Action
Imagine the horizon in the first image splitting it in half, with the sea at the bottom and the sky at the top. It feels flat, as if something is missing, although it looks nice.
Move the horizon to the lower third line in the second image. The sky abruptly takes center stage, showcasing its hues and clouds. Immediately, the image feels more dramatic and atmospheric.
This small tweak shows how the rule of thirds can drastically alter an image’s narrative and atmosphere. It is evidence that little framing features have a significant impact.
Want your photos to look more stylish and visually pleasing? Explore aesthetic photography and learn what makes images stand out.
Quick Examples of the Rule Of Thirds


When (and Why) to Break the Rule
Here’s the catch: the rule of thirds is a guideline, not a set rule. Breaking composition rules can result into some of the most excellent shots.
For example:
1) Symmetry:
When the subject is precisely centered, architectural photographs or reflections frequently appear stronger.
2) Minimalism:
A single item positioned in the center can convey a feeling of simplicity and serenity.
3) Close-ups:
When you want to convey emotion, a centered portrait might seem daring and powerful.
The secret is to understand why the rule of thirds works by first learning and using it. Ultimately, once it comes naturally to you, you’ll also know when to break it to add even more impact to your picture.
Consider it similar to music. After you become comfortable with the rhythm and scales, you begin improvising and developing your own style. The same is true with photography.
Related Inspiration:
- What Is Aperture in Photography? The Ultimate Beginner’s Guide
- What is HDR Photography – Meaning, Uses, Gear & More
- What Is Golden Hour Photography? Tips, Timing & Techniques Explained
Learnings from The Rule of Thirds
The rule of thirds is one of the easiest ways to make your photos feel more balanced, dynamic, and visually engaging. By simply adjusting where you place your subject, you can instantly create images that look more polished and professional. But photography is also about creativity, not strict rules.
Use the rule of thirds as a foundation, then experiment freely when your vision calls for it. With practice, this composition technique will become second nature and help you create stronger photos in almost any situation.
Frequently Asked Questions
Q.1 How can I enable gridlines on my camera or phone?
Ans. Most cameras and phones (DSLRs, mirrorless, smartphones) offer an option to display a rule-of-thirds grid.
Q.2 Can I crop later to follow the rule of thirds?
Ans. Yes, cropping tools in Lightroom, Photoshop, and similar editors often include a rule-of-thirds overlay to help you refine composition during editing.
Q.3 If it’s a rule, can I break it?
Ans. Definitely. It’s a guideline, not an absolute. Breaking it purposefully, such as for symmetrical shots or strong center-focused subjects, can be artistically compelling.
Q.4 What’s better: rule of thirds or golden ratio?
Ans. Start with the rule of thirds. It’s simpler and more intuitive. The golden ratio (phi grid) is more advanced and complex, but can yield more balanced compositions once you’re comfortable.