One of the most important things a photographer can learn is how to use a light meter. Knowing how to measure light will help you take consistently well-exposed pictures, whether you shoot on film or digital. With this, you can avoid making assumptions. Instead, you get accurate readings that guide your camera settings for beautiful, balanced images.
In this complete guide, we’ll explore the different types of light meters, how they work, and how to use them effectively for digital, film, and flash photography. You’ll also find practical tips, common mistakes, and answers to the most frequently asked questions about using light meters.
Table of contents
Introduction To Light Meters
Light is the foundation of every photograph. The way your camera reads and interprets light determines how your image turns out. A light meter helps you measure the intensity of light in a scene so you can choose the correct exposure settings—aperture, shutter speed, and ISO.
In simple terms, a light meter tells you how bright or dark your subject is and how to adjust your camera to capture it correctly. It removes the uncertainty that comes from relying only on your camera’s built-in metering system.
This article will answer how do I use a light meter? or how do you read a light meter?
Types of Light Meters
Knowing about the different types of light meters is important before learning how to use one. Each of the meters have a different function and complements a particular shooting style.
Built-in Camera Meters
Modern cameras come with built-in light meters. These meters measure the light reflected from the subject and automatically adjust exposure settings. While convenient, built-in meters can be fooled by tricky lighting conditions, such as backlit scenes or subjects wearing bright or dark clothing.
Built-in meters are great for everyday photography but may not always deliver perfect results in challenging light.
Also Check Out: Compositing with Photoshop Course – Start to Finish
Handheld Light Meters
A handheld light meter is a separate device that gives you more control and accuracy. It measures the light falling on the subject (incident light) or the light reflected from it (reflected light). Professional photographers often prefer handheld meters because they provide consistent and reliable readings, especially in studio or film work.
Incident Light Meters

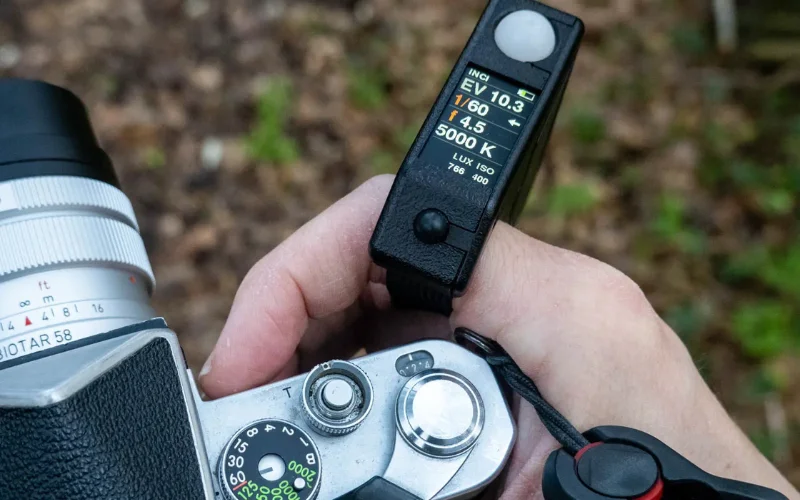
An incident meter measures the light that falls on the subject, not what reflects off it. It usually has a white dome that you place near your subject to capture the lighting conditions from their perspective
This method is extremely accurate because it measures actual illumination, unaffected by the subject’s color or reflectivity. Learning how to use an incident meter is especially useful for portrait, fashion, and studio photographers.
Also Check Out: Advanced Photoshop AI Retouching Class
Reflected Light Meters
Reflected meters measure light bouncing off your subject, similar to what a camera’s built-in meter does. They can be useful outdoors or when measuring light from a distance. However, reflected meters can be influenced by the brightness or darkness of your subject—so they’re best used with care.
Flash Meters
A flash meter measures light produced by a flash or strobe. It helps you determine the correct exposure when using artificial lighting. If you’re wondering how to use a meter for flash photography, the process involves triggering your flash while the meter records the light intensity. The reading will then guide you to adjust your aperture or flash power accordingly.
Also Check Out: Masterclass: The Art Of Creative Focus Photography
Spot Meters
A spot meter measures light from a very small area of your scene, usually one to five degrees of the frame. Landscape photographers often use them for precise exposure control, such as when shooting high-contrast scenes.
How to Use a Light Meter
Learning how to use a light meter for photography is simple once you understand the process. Here’s a step-by-step breakdown to help you get started.

1. Set Your Camera to Manual Mode
For the best results, you should set your camera to manual mode. This gives you the freedom to control the shutter speed, aperture, and ISO according to your meter’s readings. Meters could be useless if automatic modes take these settings over.
Also Check Out: Advanced Retouching & Composite Photography Course
2. Set the ISO on Your Light Meter
Your light meter needs to match your camera’s ISO. If your camera is set to ISO 200, make sure your meter is set the same. This ensures both devices interpret light under the same sensitivity conditions.
If you shoot film, this step becomes even more important. Many photographers ask, “how to use a light meter for film?”—and the key is syncing ISO correctly to match your film speed.
3. Choose the Appropriate Metering Mode
Depending on your subject and lighting, choose between incident, reflected, or flash metering.
- Incident mode – measures light falling on your subject.
- Reflected mode – measures light bouncing off your subject.
- Flash mode – measures the burst of light from a flash.
- Selecting the right mode is crucial for accurate exposure.
Also Check Out: Gonzography Masterclass: Unlock Creative Expression
4. Take a Light Reading
Point your meter correctly depending on your mode. For incident readings, position the dome facing your camera from the subject’s location. For reflected readings, point the meter toward your subject. Flash, trigger your flash while holding the meter near your subject.
The meter will display the ideal aperture or shutter speed for your set ISO. This step answers one of the most common questions—“how do you use a light meter?”
5. Adjust Camera Settings
After getting your reading, set your camera’s aperture, shutter speed, or both based on what your meter suggests. You can always fine-tune slightly for creative effect—like adding a stop of overexposure for a brighter look or underexposure for a moodier tone.
Now you know how to read a light meter and apply it to your camera.
Also Check Out: Masterclass: Travel & Nature Photography Techniques
How to Use a Light Meter for Different Photography Scenarios
Different types of photography require slightly different approaches. Let’s explore how to use a meter effectively in each.
For Digital Photography
Learning how to use a light meter for photography in the digital era may seem unnecessary because cameras have advanced metering systems. But handheld meters still offer unmatched accuracy.
Here’s how to do it:
1. Set your ISO on both camera and meter.
2. Take an incident light reading.
3. Input the suggested settings manually into your camera.
4. Capture a test shot and review the histogram to confirm balance.
Using a light meter helps you minimise post-processing and get consistent exposure across multiple shots, ideal for product, portrait, or commercial shoots.
Also Check Out: Masterclass: Professional Street Photography Workflow
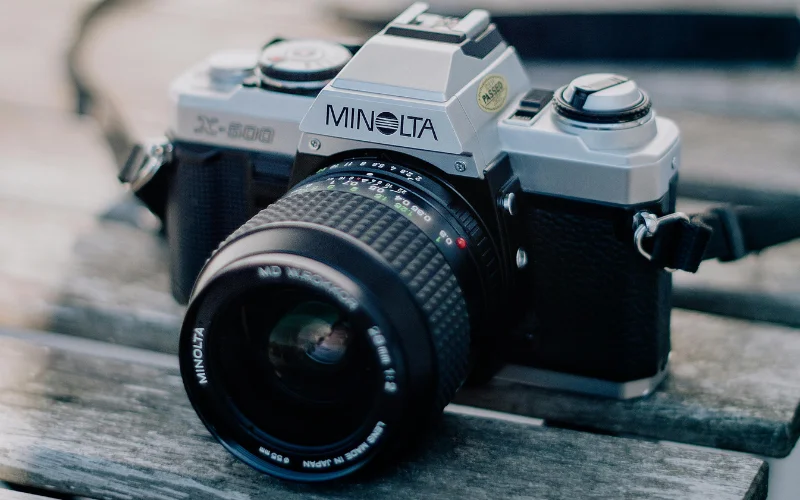
For Film Photography
Film doesn’t forgive mistakes like digital sensors do. That’s why learning how to use a light meter for film is essential.
When shooting film:
1. Match your ISO to the film speed (e.g., ISO 100 for Kodak Ektar 100).
2. Use an incident meter for accuracy, especially outdoors.
3. Avoid relying on reflected readings since film reacts differently to highlights and shadows.
If you’ve ever asked, “how to read a light meter film camera?”, remember: for film, err on the side of slight overexposure. Film handles highlights better than shadows.
For Flash Photography
Flash introduces short bursts of light that a camera’s built-in meter can’t measure accurately. That’s where a flash meter becomes invaluable.
Here’s how to use a light meter for flash photography:
1. Set your camera and meter to the same ISO.
2. Choose “flash” mode on your meter.
3. Hold the meter near your subject with the dome facing the light source.
4. Trigger your flash manually or with a sync cable.
5. The meter will display an aperture value—use this setting on your camera.
Flash metering ensures your light isn’t too harsh or underexposed, helping you create perfectly balanced portraits.
Also Check Out: Masterclass: Boudoir For Every Body Through An Inclusive Lens
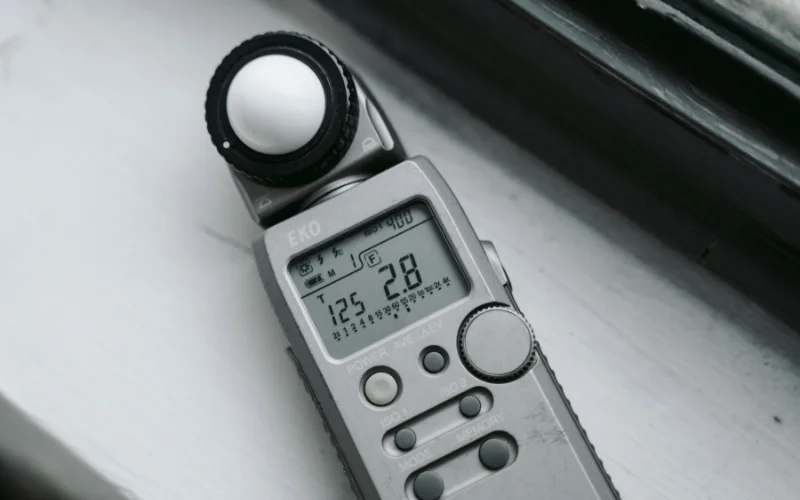
Using a Sekonic Light Meter
Sekonic is one of the most popular brands of professional light meters. If you’re wondering how to use a Sekonic meter, here’s a quick guide:
1. Turn on your Sekonic meter and set your ISO.
2. Select the metering mode (incident, reflected, or flash).
3. Position the dome as needed.
4. To take a reading, press the measure button.
5. Adjust your camera settings accordingly.
Sekonic meters are known for precision and ease of use, making them a reliable choice for both beginners and professionals.
Tips for Accurate Light Meter Readings
Even the best meter won’t help if you use it incorrectly. Follow these simple tips to get precise readings every time.
- Measure from the subject’s position – This ensures your meter captures the light your subject receives.
- Avoid shadows or obstacles – Keep the meter clear of any shadows when taking readings.
- Recheck readings when light changes – Outdoor light can shift quickly, so re-meter as needed.
- Use a gray card for reflected readings – This helps neutralize color bias and ensures accuracy.
- Keep your meter calibrated – Regular maintenance ensures consistent performance.
Also Check Out: The Powerful Self Portrait Photography Book
Common Mistakes and How to Avoid Them
Even experienced photographers make errors when using light meters. Here are a few to watch out for:
1. Ignoring the Light Meter’s Reading
Sometimes photographers take a reading but still rely on their camera’s LCD preview. Trust your meter it’s more accurate than what your screen shows.
2. Not Considering the Subject’s Reflectivity
Highly reflective or very dark subjects can mislead reflected readings. Use incident mode whenever possible to avoid exposure errors.
3. Overlooking the Lighting Conditions
Lighting changes quickly, especially outdoors. Always recheck exposure when clouds move or the sun shifts.
Conclusion
Mastering how to use a light meter gives you control over one of the most important elements in photography—light. It helps you understand exposure deeply and ensures your photos come out exactly as you envision them, whether you shoot digital, film, or flash.
Light meters eliminate guesswork, improve consistency, and reduce time spent editing. Whether you use a Sekonic meter, an analog meter, or your camera’s built-in system, understanding how to read and apply light measurements will elevate your photography to a professional level.
So the next time you step out to shoot—don’t just rely on your camera. Take your light meter with you, measure carefully, and see the difference in every frame.
Frequently Asked Questions
1. How do you use a light meter for digital photography?
Match your camera’s ISO, point the meter at your subject or light, take a reading, and set your camera to those numbers.
2. How do you read a light meter on a film camera?
Half-press the shutter and check the meter inside the viewfinder. Keep the needle or light in the center for correct exposure.
3. Can you use an analog light meter with a digital camera?
Yes, you can. Just set the same ISO and use the readings to adjust your camera settings.
4. How do you use a Sekonic light meter?
Set ISO, choose ambient or flash mode, point the dome toward your camera, press measure, and use the shown settings.
5. Do you need a light meter for flash photography?
It helps a lot. A light meter displays the exact flash power, allowing you to achieve the right exposure faster and more consistently.