How to capture beautiful HDR pictures on an iPhone?
In this ever-changing world of photography, we see many different effects and modes, moving up the trend and falling drastically. But this High Dynamic Range (HDR) imaging is here to stay.
They allow photographers to capture the right light and a broader range of tones and details.
With the ever-improving camera technology in iPhones, harnessing the capabilities of HDR photography has never been easier.
Therefore, the iPhones and HDR act as really compatible partners.
In this comprehensive guide, we’ll delve into the intricacies of HDR photography on your iPhone, providing valuable insights, practical tips, and recommended apps to enhance your skills.
Capture HDR Pictures On iPhone – Table Of Content
- Understanding HDR Photography
- Set Up for HDR Pictures On iPhone
- Top Tips To Capture HDR Photo iPhone
- Tip 1: Capture in RAW
- Tip 2: Lock Focus and Exposure
- Tip 3: Patience is Key
- Tip 4: Avoid Moving Subjects For HDR Pictures On iPhone
- Tip 5: Keep An Eye On Storage
- Tip 6: Maintain a Natural Look
- Tip 7: Practice & Experiment With HDR Photos On iPhone
- Tip 8: Use HDR Editing Software For iPhone
- Tip 9: More HDR Is Not Always Better
- Tip 10: Experiment With Bracketing
- Recommended HDR Editing Tool For Desktop
- Conclusion
Understanding HDR Photography
What is HDR?
In photography, HDR stands for high dynamic range. Dynamic range is simply the range of a photo’s lightest to darkest tones.
Put another way — it measures the light intensities from the highlights to the shadows.
The HDR pictures on the iPhone help capture multiple images at different exposure levels and then merge them to create a final HDR photo iPhone with a broader dynamic range.
This technique helps preserve details in the highlights and shadows, producing a more balanced and visually appealing image.
Put another way — it measures the light intensities from the highlights to the shadows.
We agree that HDR’s meaning sounds complicated initially, but don’t worry!
HDR is super easy to use on the iPhone and doesn’t cause photo exposure problems.
Also read: Exploring the World of Creative Light Painting Photography
Why Use HDR on iPhone?
iPhones have been adding unique new features with every new model and update. 100/100 for their every evolving strategy.
It helps so many users experiment with various things, not just photography.
Modern iPhones come equipped with very advanced camera systems. These cameras are capable of capturing impressive details.
HDR pictures on iPhone optimize exposure in challenging lighting conditions, delivering vibrant and well-balanced photographs.
Therefore, HDR is one of your Camera app’s best iPhone settings.

The human eye can view things with a highly dynamic range, but that is not possible with the iPhone’s camera.
Your iPhone camera can’t simultaneously capture a picture in dark and very bright areas.
Suppose you’re looking forward to shooting a high-contrast scene. It is most likely that you face exposure problems in your photo. (Exposure refers to the brightness of an image).
When Can You Use iPhone HDR?
As discussed earlier, HDR on iPhone is very beneficial for capturing high-contrast photos. High contrast in images with either dark shadows or bright highlights.
HDR photography is the perfect place to neutralize your images.
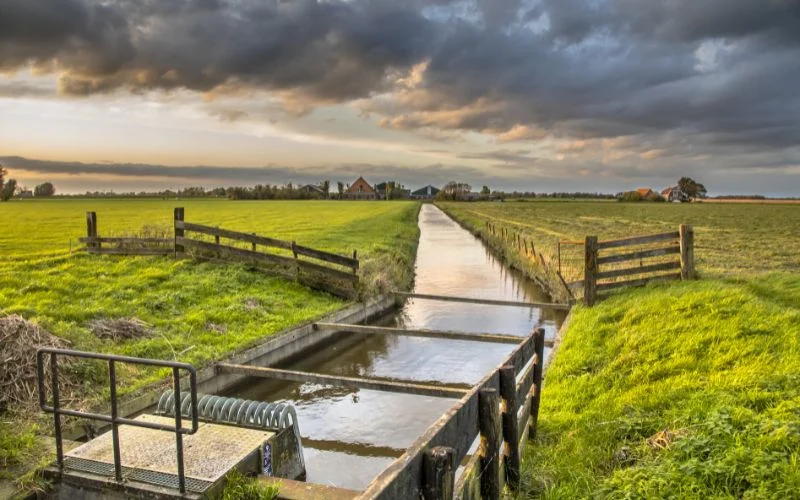
HDR can be perfect for landscape photography. Landscape scenes often have a lot of exposure and are in high contrast, with the foreground much darker than the sky. In such a case, HDR is your best friend!
Let’s look at an example to understand better.
The image below is shot without HDR. You can see how the area of the sky is overexposed. Therefore, it does not reflect any cloud details or show any colours. It is just plain and white, which does not do justice to the sunset sky.
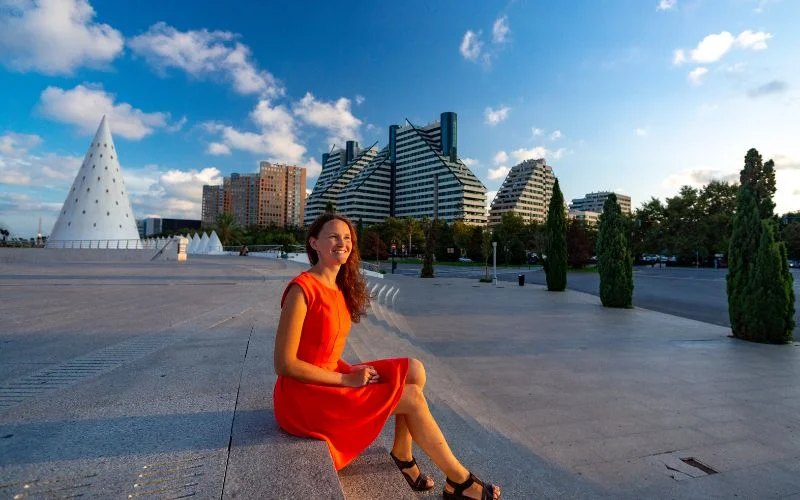
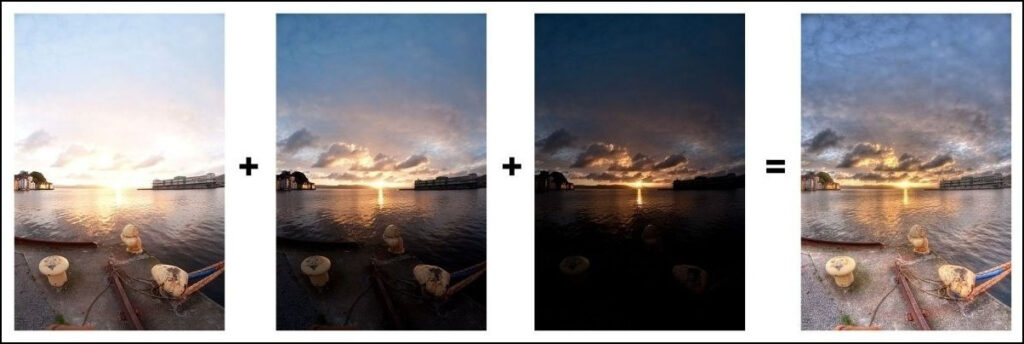
Now, let’s look forward to the magic of this tool. Let’s compare the above image to the HDR version below.
Using HDR pictures on an iPhone has resulted in a beautiful, perfect sunset photo with plenty of colour and detail in both the foreground and the sky.
Also read: Key Photography Tips For Spectacular Shots

When You Should Refrain From Using HDR On iPhone
Every tool has its capabilities and limitations. Let’s discuss some cases in which HDR should not be used.
If you are intentionally looking forward to a high-contrast nature for your photo, keep HDR switched off.
For example, if you’re shooting in harsh sunlight, the contrast between light and shade can create wonderfully dramatic compositions.

Also, if you want to capture a silhouette photo where the model/subject is utterly black against a bright background, kindly refrain from using HDR.
If you switch on HDR, the shadows will appear brighter, and you won’t get the dark silhouette effect.
Check out: 10 Free HDR Lightroom Presets
Set Up for HDR Pictures On iPhone
Now that we have understood the situation, we should prefer to Use HDR & where not. Let’s move forward and see how to set up your iPhone for HDR photos.
With more accessible smartphone photography, you don’t need to carry cameras everywhere. Taking HDR pictures on an iPhone is one of the best and easiest ways to capture HDR photos.
iPhone helps with the utmost details for your images. Therefore, the iPhone x HDR is the perfect collaboration ever. Your iPhone has an HDR mode that automatically captures and merges multiple exposures.
To enable it, open your Camera app, tap on “HDR” at the top, and choose either “Auto HDR” or ” On”, depending on your preference. The Auto HDR setting is recommended for most situations, as it intelligently activates HDR when needed.
Top Tips To Capture HDR Photo iPhone

Let’s dive into a few iPhone photography tips while capturing HDR photos.
Tip 1: Capture in RAW
Consider shooting in RAW format for more flexibility in post-processing. This provides greater control over exposure and colour adjustments during editing.
Tip 2: Lock Focus and Exposure
Use the AE/AF lock feature to maintain consistency across multiple exposures. Tap and hold on to the screen to lock focus and exposure before capturing the HDR sequence.
Also read: The Ultimate Camera Buying Guide For Beginners
Tip 3: Patience is Key
HDR photography involves capturing multiple images. It is difficult to find the right shot at the very first time.
So patience is crucial. Hold your iPhone steady throughout the exposure sequence. Try various angles, check what compliments your images the most, and allow the device to process the HDR image after capturing.
Tip 4: Avoid Moving Subjects For HDR Pictures On iPhone
As mentioned earlier, HDR requires patience, and with patience comes stability. You need the right blend of focus and exposure to capture your best shot. Therefore, refrain from using moving subjects in your HDR photos.
Choose stable and stiff subjects so that you can take your time to adjust and focus.
Also read: The Ultimate Guide to Sell Your Pictures Online
Tip 5: Keep An Eye On Storage
HDR photos capture very minute details and beautiful colors. Therefore, they are heavy in comparison to other photographs.
So make sure you don’t flood your device before going for your photoshoot. Clear space in your device to capture multiple options for yourself.
Be mindful of your device’s storage capacity, especially if you take a lot of HDR shots. Otherwise, you can also opt for cloud storage, which provides abundant space on your phone.
Tip 6: Maintain a Natural Look
While clicking HDR pictures on an iPhone can create dramatic effects, avoid over-processing your photos to maintain a natural look. Aim for a balanced exposure that preserves highlight and shadow details without looking overly saturated or artificial.
Tip 7: Practice & Experiment With HDR Photos On iPhone
Like any photography technique, mastering HDR photography on an iPhone requires practice and experimentation. Explore different scenes, lighting conditions, and editing techniques to develop your skills and create stunning HDR images.
Tip 8: Use HDR Editing Software For iPhone

Here are top HDR Editing Software/Apps for iPhone you can use:
Tip 9: More HDR Is Not Always Better
Although it may seem beneficial to consistently rely on HDR to achieve a well-balanced exposure throughout the entire image, there are instances where disabling HDR can yield better results. Photography depends on the interplay of light and shadow, and often, images are enhanced by areas of darkness or intentionally unbalanced exposures, capturing silhouette photography, for example.
Tip 10: Experiment With Bracketing
Some third-party camera apps for iPhone offer bracketing features, allowing you to manually capture a series of photos at different exposure levels. This gives you more control over the HDR process and lets you fine-tune the final result by selecting the best-exposed shots for blending.
Also read: A Handy List Of Standard Photo Print Sizes To Suit Your Needs
Recommended HDR Editing Tool For Desktop
If you’d instead edit the photos on your desktop, this is the best HDR editing software to try.
Pure HDR – Create Fascinating HDR Images
This is an ultimate HDR plug-in extension to create genuine 32-bit TIFFs for Lightroom & Photoshop.
What’s Included in this tool:
- 32-Bit-HDR Images with Complete Lighting Information
- Lossless 32-Bit-TIFF Compression Output and Specialized HDR Formats
- Compatibility with Windows and Mac
- It Also Includes a User-Manual and a List of Supported Forms
To learn more about adjusting HDR camera settings on iPhone, click here
Conclusion
High Dynamic Range (HDR) imaging has become a lasting trend in the dynamic world of photography, especially with the advanced camera technology in iPhones.
This guide unravels the simplicity of HDR on your iPhone, offering valuable tips and insights. HDR, which captures multiple exposures to enhance dynamic range, is a user-friendly tool that effortlessly solves exposure issues.
It shines in high-contrast scenarios like landscapes, transforming photos into vivid masterpieces. Set up your iPhone with the built-in HDR mode, tap into tips like capturing in RAW, and explore a powerful editing tool like Pure HDR.
Embrace HDR, let your iPhone become a creative ally, and elevate your photography with stunning, dynamic captures. Transform your photo journey with the magic of HDR on your iPhone!
Also, check out The Ultimate Camera Buying Guide For Beginners
Like this post? Check out more photography tips & inspiration here.