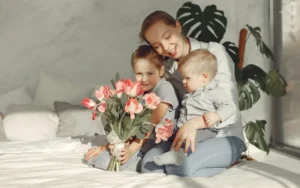
Are you a photographer who loves the look of professionally-lit studio portraits, but doesn’t have studio lighting equipment yet?
I have great news! You do not need expensive lighting gear to create studio-quality portraits. Let’s talk about how you can create beautiful studio portraits using 100% natural light.

If you’ve been interested in studio portrait photography or are a professional photographer, you already know that beautiful, intentional lighting is crucial in portrait photography. Normally, we’d achieve this look using strobes, constant lights, and other powered studio gear.
However, great portraits can also be achieved using natural light if you know how to use it to your advantage.
In this blog post, we will explore some essential tips and techniques to help you create stunning studio-style portraits using only natural light.
Table of contents
Understanding Natural Light Quality & Quantity
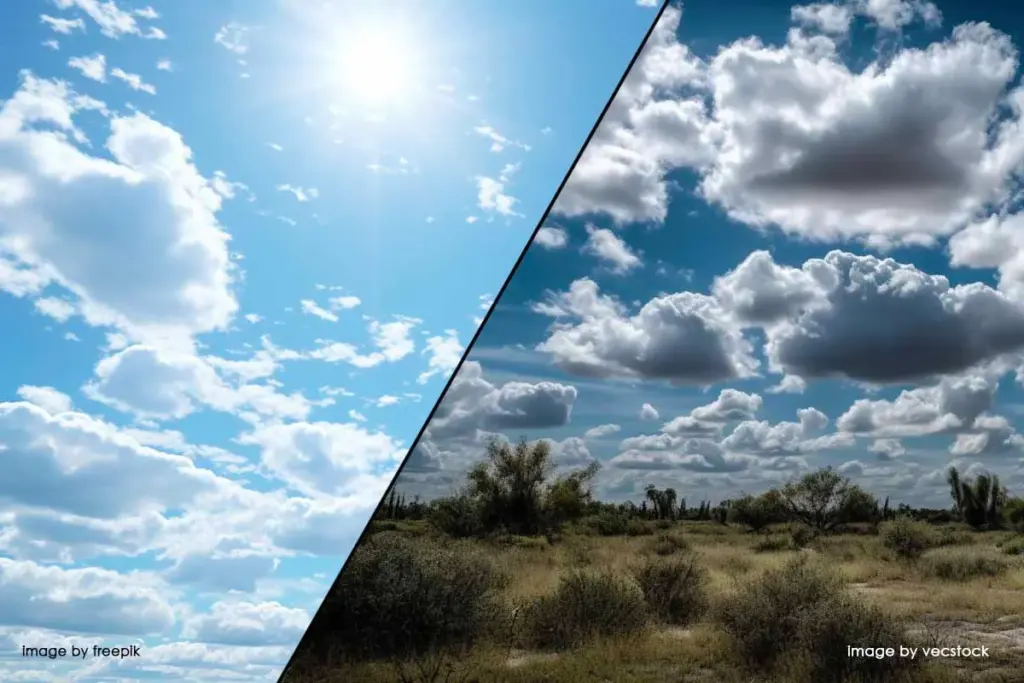
Before we dig in, let’s talk about what natural light is and how it can be used to create beautiful portraits. Firstly, natural light is the light that comes from the sun, which can be diffused or harsh depending on the time of the day.
You should also know that the quality and quantity of natural light matter. The time of day, weather conditions, and geographical location will all make a difference in the quality of work you are able to produce.
I like to think of the quality of light as the light’s “voice.” What is the light saying (and sometimes even singing!) to you? How can we use the light’s voice to help us achieve the style of portrait we are going for?
For instance, during the golden hour, light is generally soft, warm, and diffused, creating a glow. To me, the sun sings a lullaby during the golden hour and will help me create soft, flattering, glowing portraits!
I love to use this light when shooting creative portraits that should be friendly, approachable, engaging, and attractive. My favorite way to wield the light during the golden hour is with a very large reflector, like a 6-foot foam board or V-flat.
The low sunlight catches the reflector beautifully and reflects back an even wash of bright light onto my subject (more on this later!).
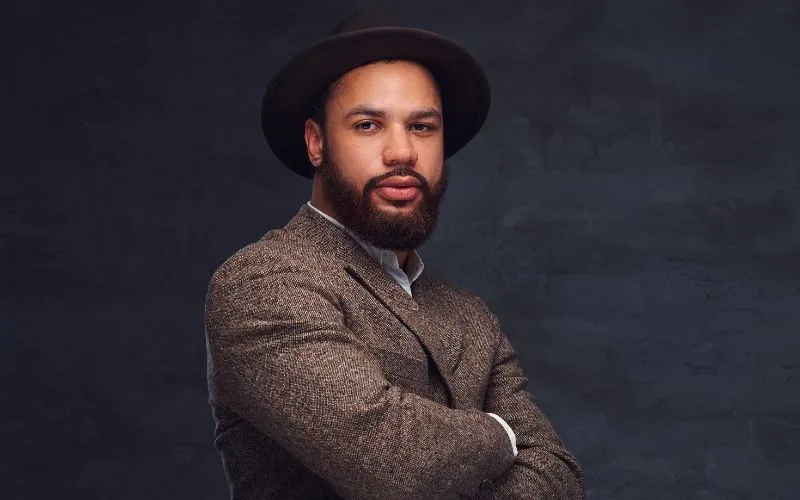
On the other hand, during midday, light can be harsh and direct, creating strong shadows. It’s voice seems a bit like shouting to me. But there is a strong case to be made for using this type of light, too!
When I’m going for a dramatic, editorial style of portrait, direct, full sun can be hard to beat when you know how to position your subject in relation to the sun.
Check out: Unlocking the Power of Self Portrait Photography: Tips and Ideas
If I’m going for dark and moody, then I prefer the quality and voice of an overcast day. Not too dark of clouds—but a sky full of light clouds will cool the color tone of the image and offer more soft shadows.
The quantity of natural light is something to consider as well. If your day is very dark and cloudy, you may not have enough light to work with effectively. (Important side note: keep an eye on the weather; if it looks like rain or dark clouds, it may be best to reschedule, even if you are planning to shoot inside.) To get studio portraits with sunlight, you need plenty of light to work with.
Now that you’ve got a basic understanding of natural light, let’s move on to the fun part! Creating beautiful portraits that look like they were taken in a professional studio. Here are four ways you can try!
The location will play a crucial role in your natural light portrait photography. Finding the right location can make a significant difference in the overall quality of your photos because certain areas may not let in enough natural light during certain times of the day.
1. Making Your Garage Work For You
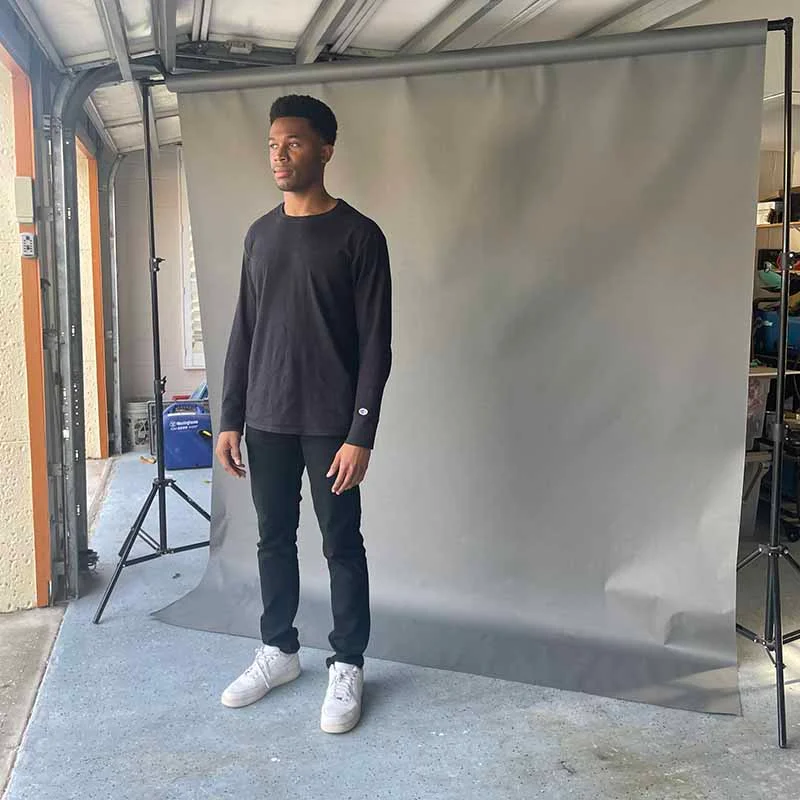
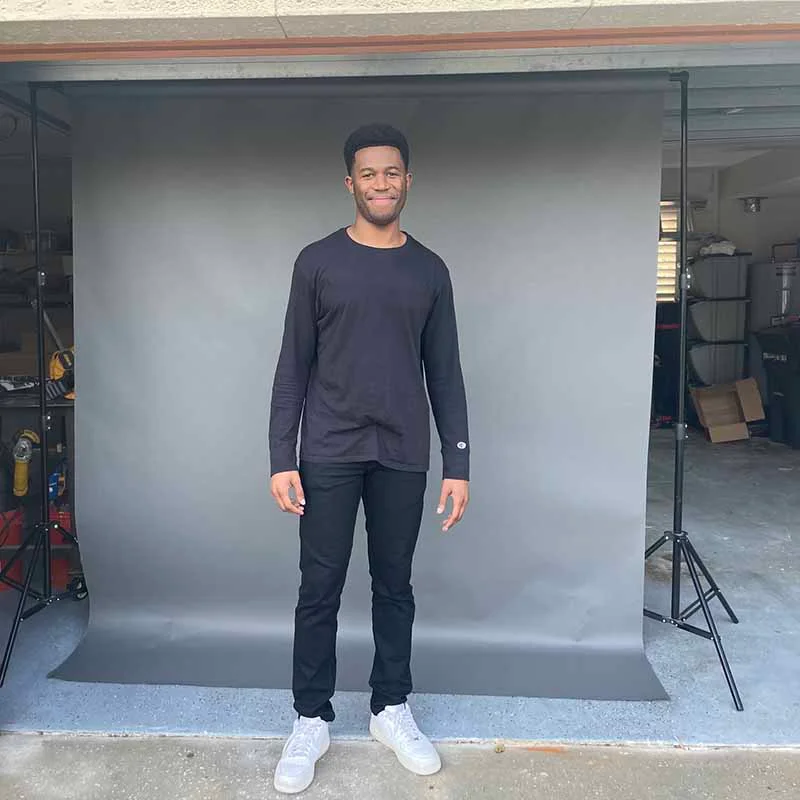
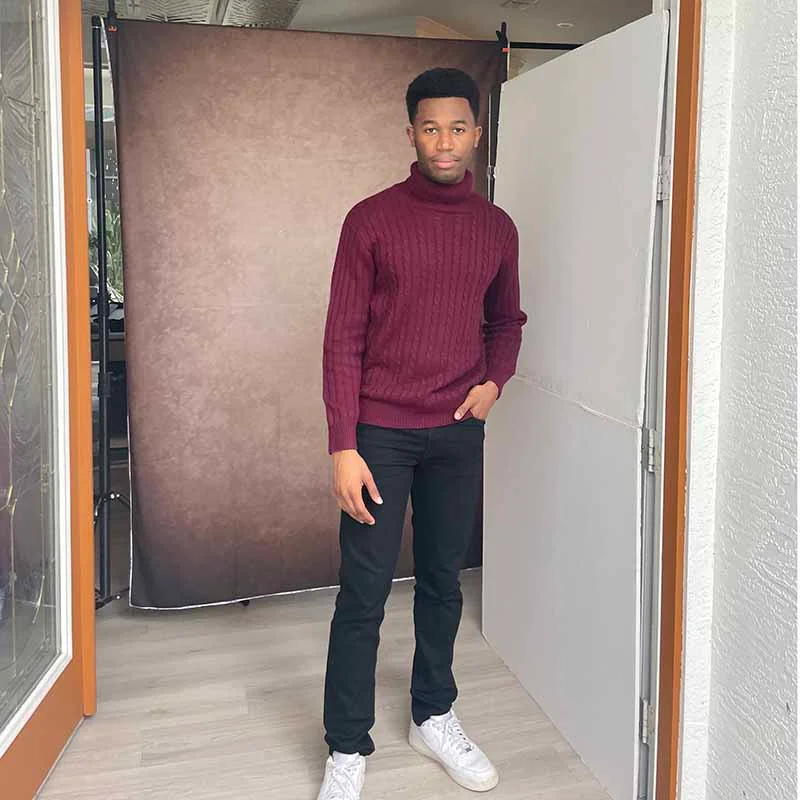
Get your broom out and get ready to sweep a leaf or two away, because your very best choice for crafting studio-style natural light portraits is your very own garage!
The large square opening acts like a giant softbox, and the cover overhead provides good shade for the top of my subject. This light looks incredibly tailored, with appropriately placed shadows.
You can shoot either face-on to the light or at a 45-degree angle to the light for a rich, moody look. I love both! Add standing reflectors on either side of your subject for a brighter feel, or remove them to bring in those beautiful, crafting shadows that studio lights are known for.
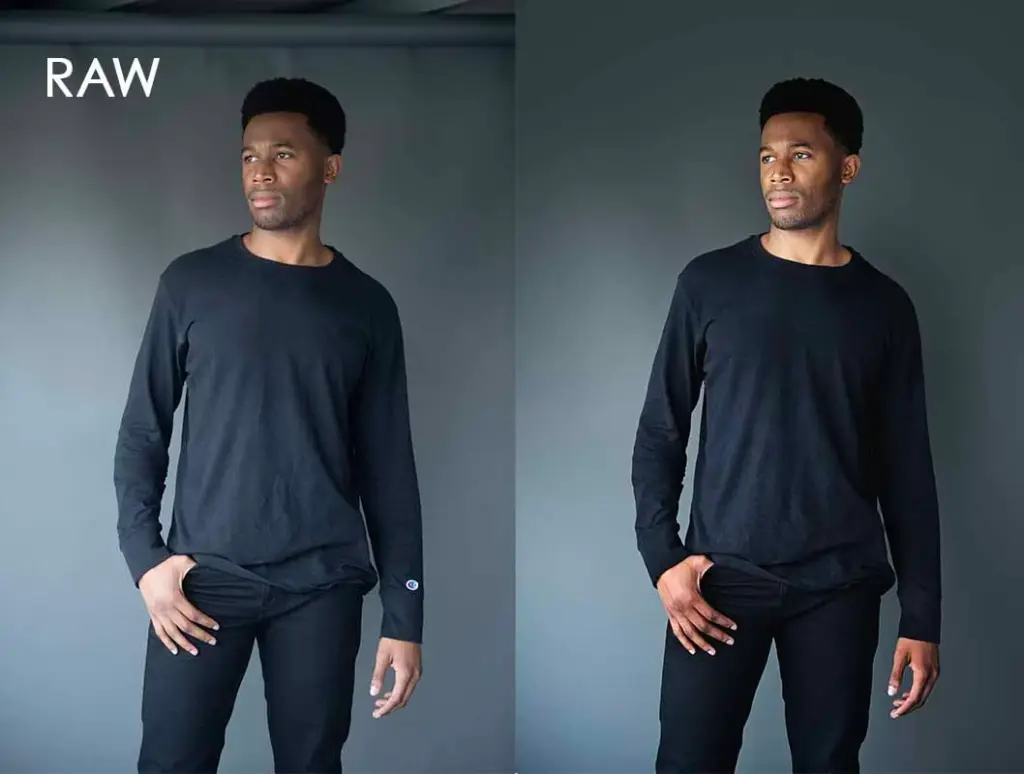
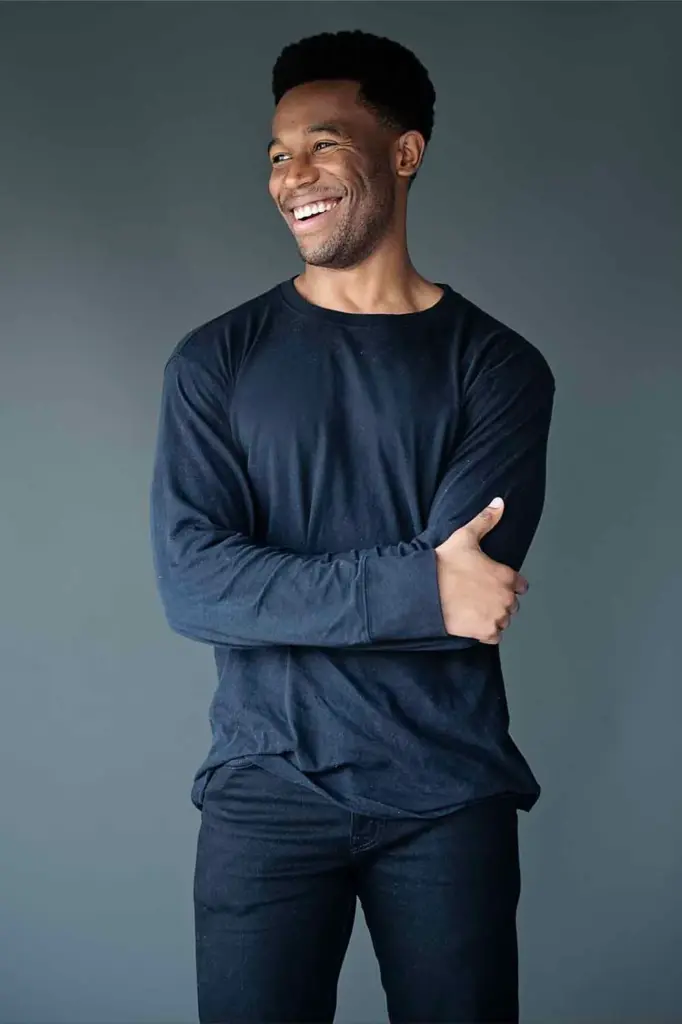
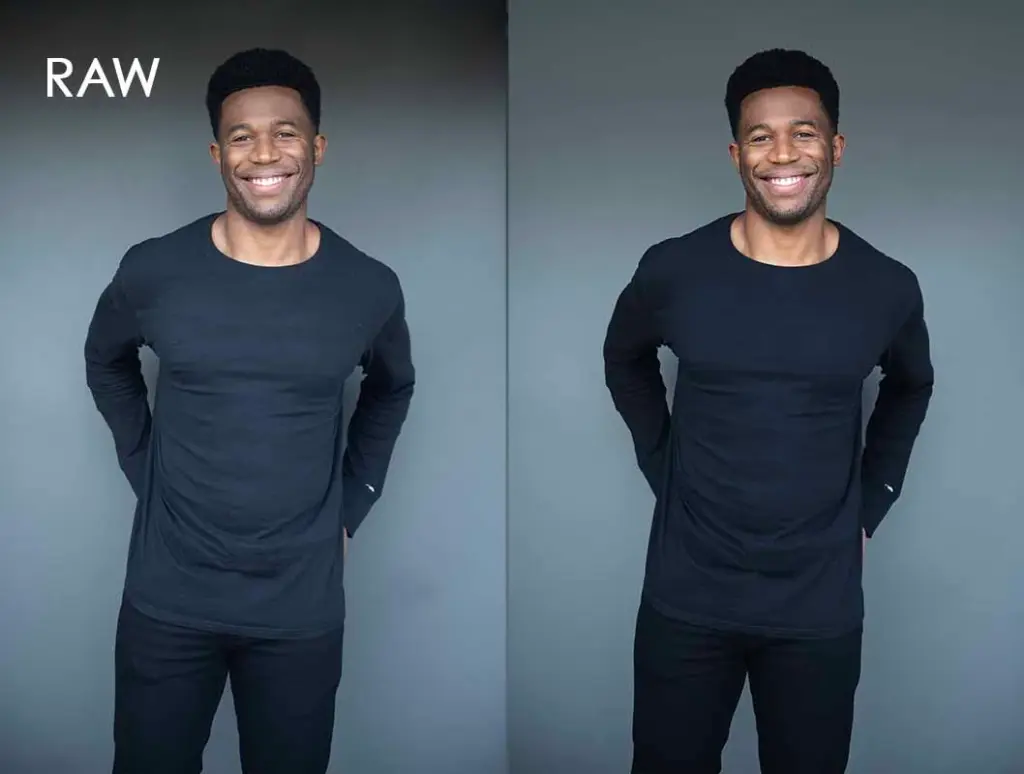
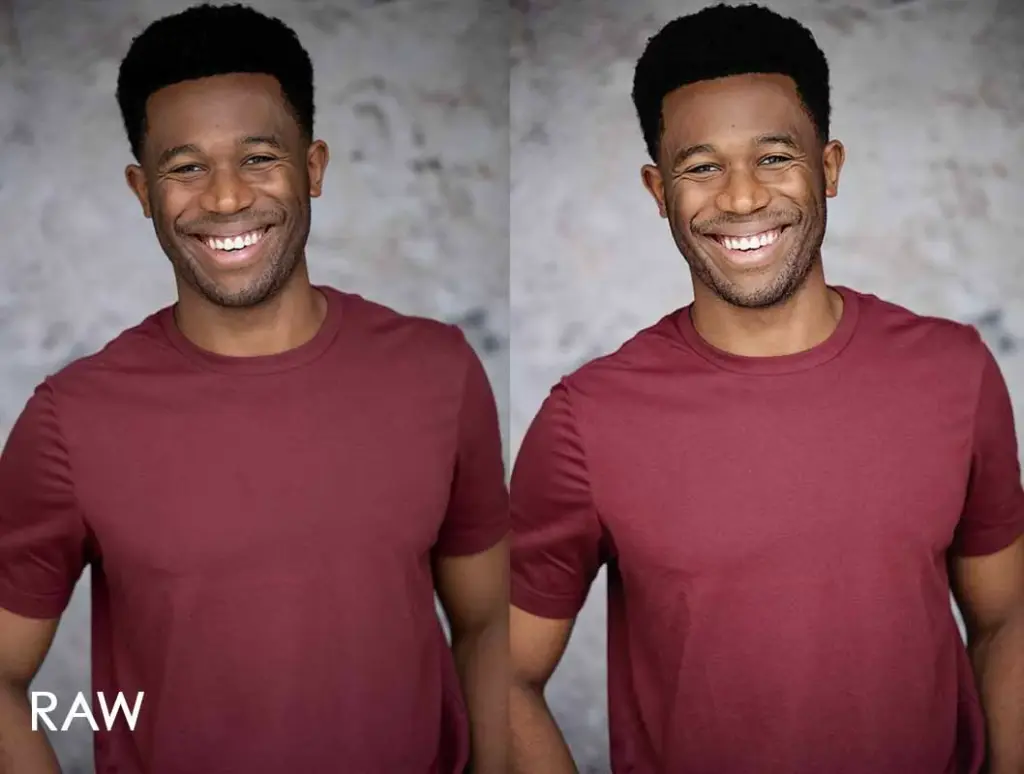
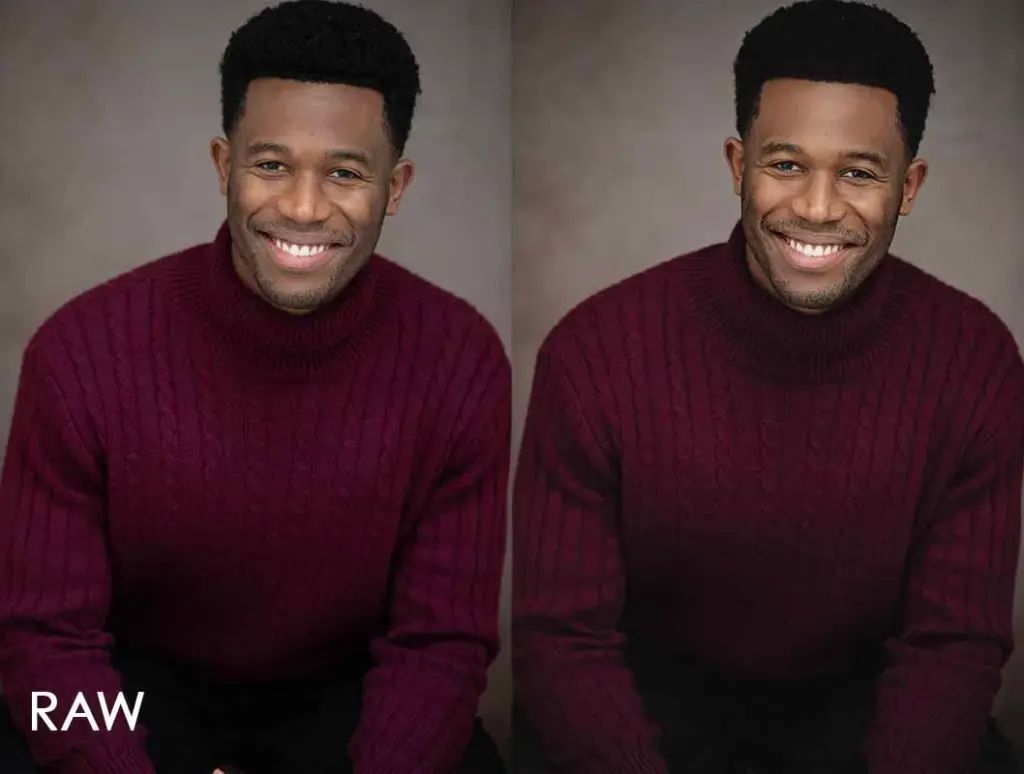
In the portrait session below, we started with shadows and drama by placing the backdrop at a 45-degree angle to the light. In the example image, you can see how the shadows are already in place straight out of the camera.
I made minor enhancements in post-processing by increasing the contrast, adding a light color grade, and extending the backdrop, but that is nothing new to studio portrait photographers!
You may find that extending the backdrop becomes a new norm when you shoot using garage light, as often we don’t have the ceiling height we normally need to produce a full image. But a little pull and tug on the top, and we have a beautiful, clean backdrop for this portrait.
If you don’t know how to extend a backdrop using Photoshop yet, you can avoid this hassle by cropping your photo in closer to your subject—either by zooming in during the session or cropping in afterward in post-production—and keeping your subject as close to the backdrop as possible during the session.
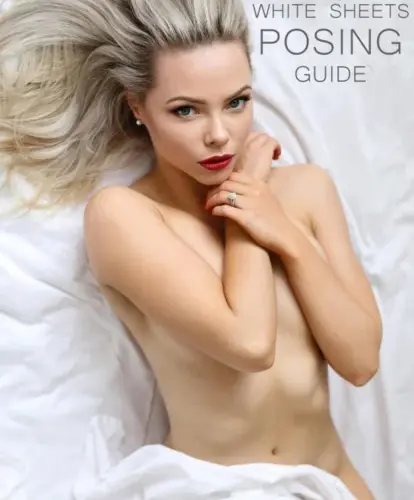
Check out: Mega Posing Guide Collection & Posing Cards
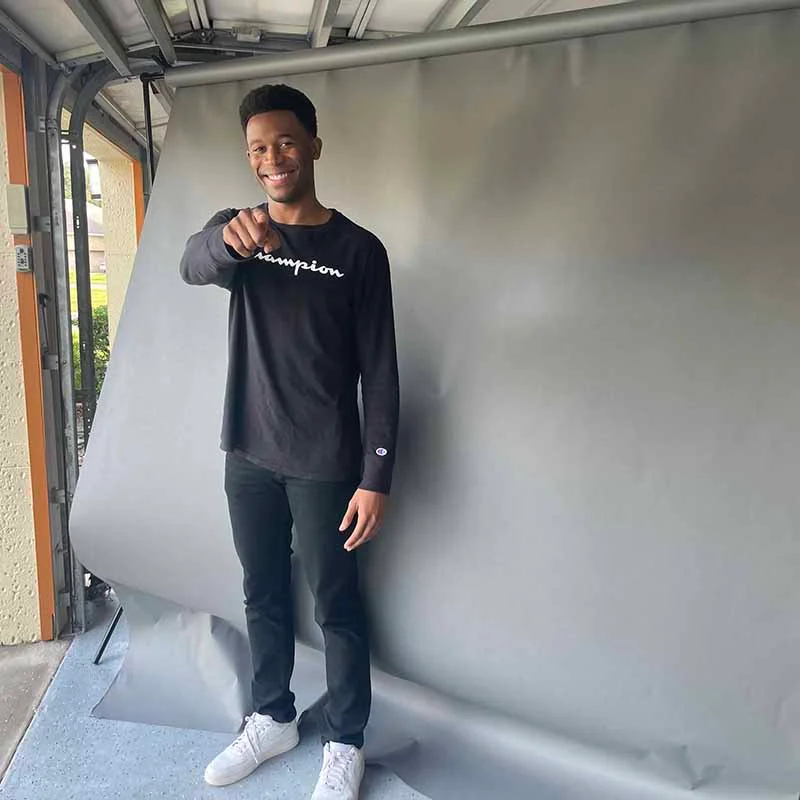
When you are using 45-degree backdrop placement, be sure to capture some candid portraits – having your subject turn his or her face toward the light. These images are truly dynamic!
Next, we brought the backdrop around to fully face the outside. The backdrop is pretty close to the garage door. I kept the subject just under the shade and as close to the natural light as possible without exposing his head to the sky.
This type of light is bright, friendly, and attractive for nearly any body type or skin tone! Remember to make sure your subject’s head is covered!
One note about backdrops when you use garage light: the top of your backdrop will likely be darker than the rest of the backdrop, and significantly so when the backdrop is close to the garage door entrance.
Pull the backdrop into the garage more for a darker look with more evenly distributed light on the backdrop. I personally don’t mind the two-toned look! But I opted to even out the coloring in post-processing for a more professional appeal.
An important note about shooting with a garage light: the quality of the light matters! In my example above, I was fortunate to have light, cloudy skies. This produced even less light but was still strong enough to create “pop” in the image. If we had experienced full sun, I may have had to “cover” the ground with a dark cloth in order to prevent too much reflection from the floor.
The best time of day for garage light sessions will depend entirely on which direction your garage faces. Try for a time of day when the lighting isn’t too harsh near your subject. Ideally, when the sun is behind your garage a bit.
One more thing to be prepared for when doing outdoor portrait photography: wind can be an issue when you have a backdrop outside, even inside a garage! Bring friends to help, weights for the backdrop, and try to pick a day when the weather is calm.
During our session in the garage, we had a slight breeze teasing us during the session. I simply closed the far side of the garage to prevent air flow, and that did the trick! We were able to prevent billowing at the bottom of the paper and carry on with our session.
2. The Perfect Frame Of light That Everyone Has
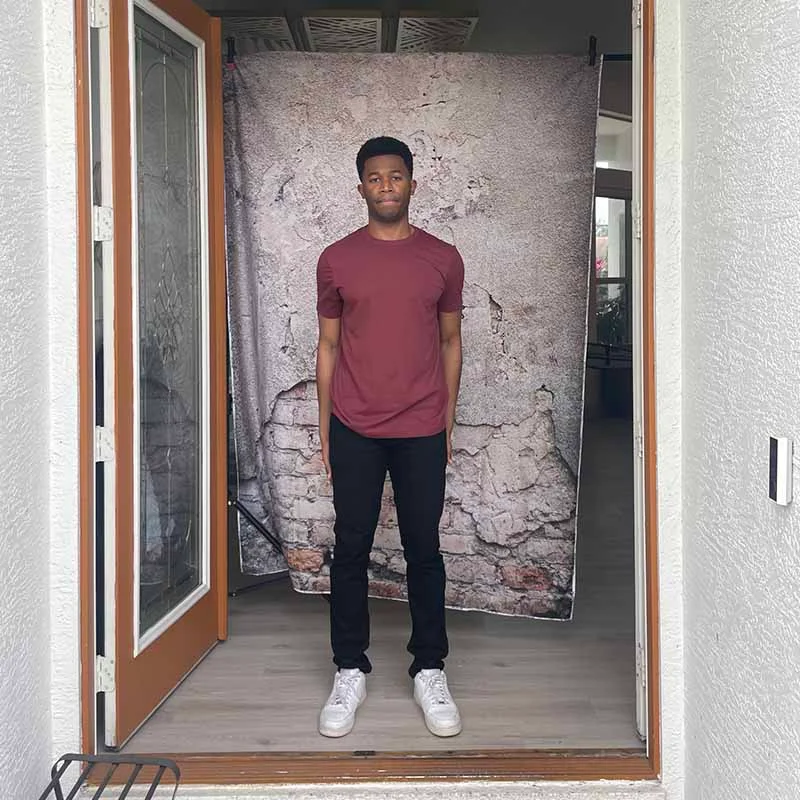
Another excellent location option is the open front door of a house. Pick a time of day when the sun is bright but not too close to the front door. You want a lot of light for these portraits, but not direct sunlight.
Have your subject stand just barely inside the doorframe, with your backdrop 1-2 feet behind. Shoot with a low aperture of 2.8 and zoom in as far as your lens will go if you want to create a creamy background and let in the maximum amount of light.
Check out: Masterclass: Easy Yet Powerful Studio Lighting Tutorial
Add reflectors if you would like to brighten your image, or opt for just the front-facing light that comes from the great outdoors! Make sure that your subject’s head is always covered. When the top of your subject’s head is exposed to sunlight (even clouded sunlight), your subject’s eyes will be dark, their forehead will be overexposed, and you will lose the professional studio quality we’re going for. The light should be painting your subject from the front.
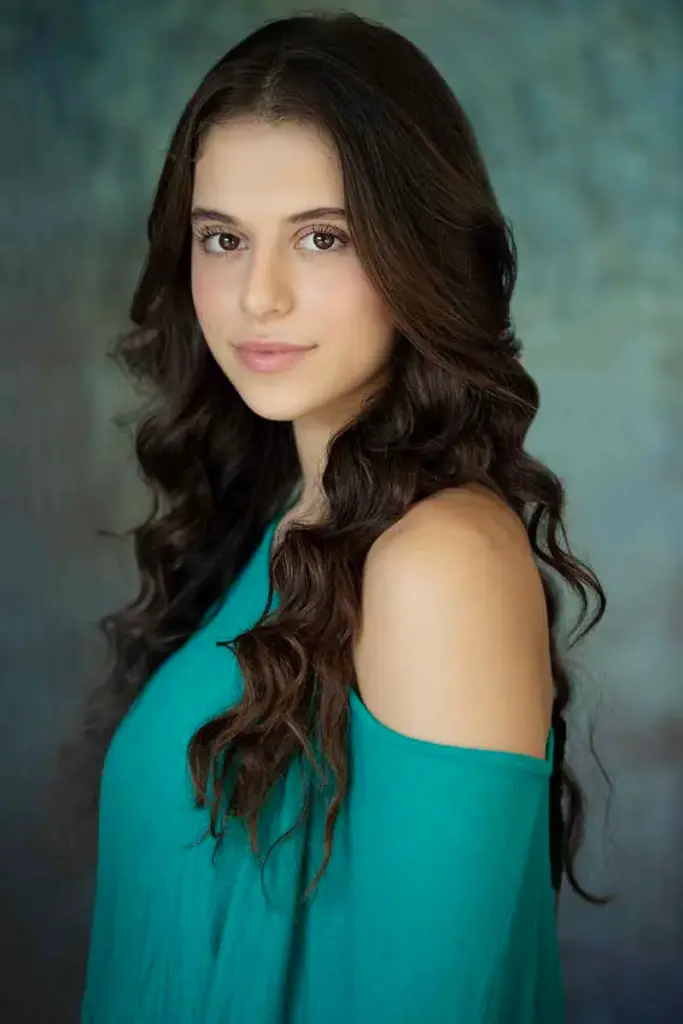
The front door light is one of the most flattering natural lighting fixtures you can find for natural light portrait photography. It is soft, yet curated, and works for all types of skin tones.
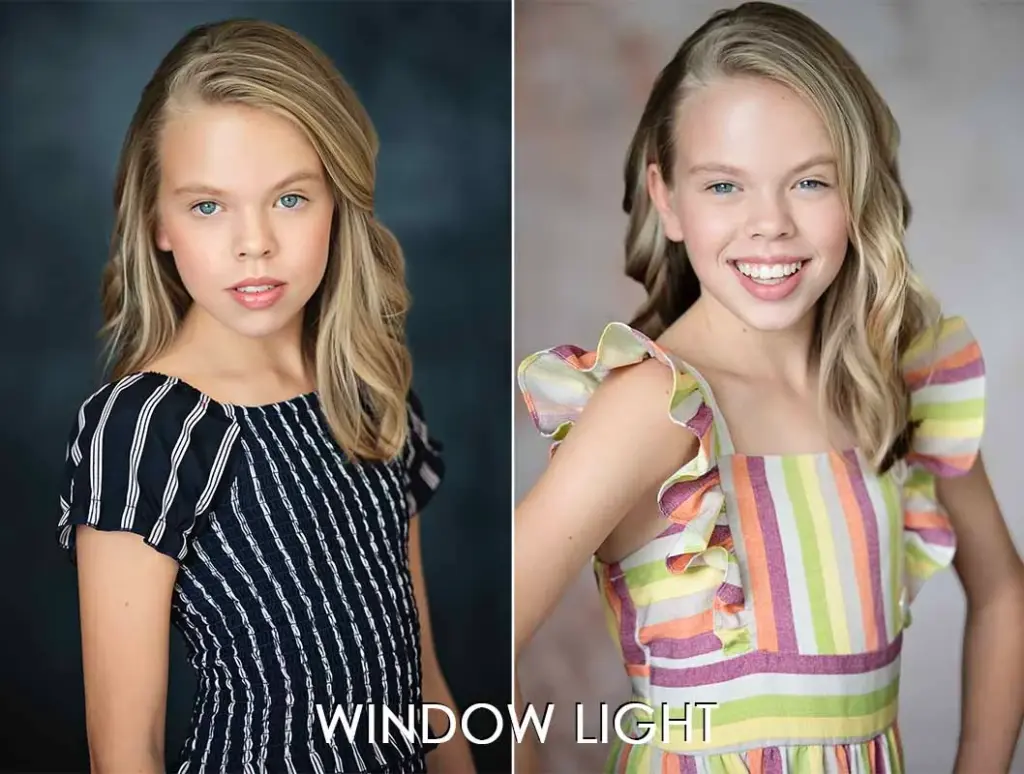
3. Windows & Sunshine, Soft & Sweet
Shooting inside is a great option for natural light portrait photography. It is great if you can find the right spot and pick the sunniest time of day. When shooting fully indoors, look for areas that have large windows or doors that allow natural light to flow in.
The light that comes in through the windows will be soft and even, creating ideal conditions for natural light portrait photography. If the natural light is too bright, you can use sheer curtains or other objects to diffuse the light.
Aim for a bright time of day. If it looks like rain or weather that is full-on dreary, you may need to reschedule. Loads of diffused light are necessary for indoor natural light studio shots to really shine.
Here in this home, there are large sliding glass doors that face west—a perfect, large softbox. We cleared the couches to make space for backdrops and our young actor.
Check out: Essential Street Portrait Photography Tips For Beginners
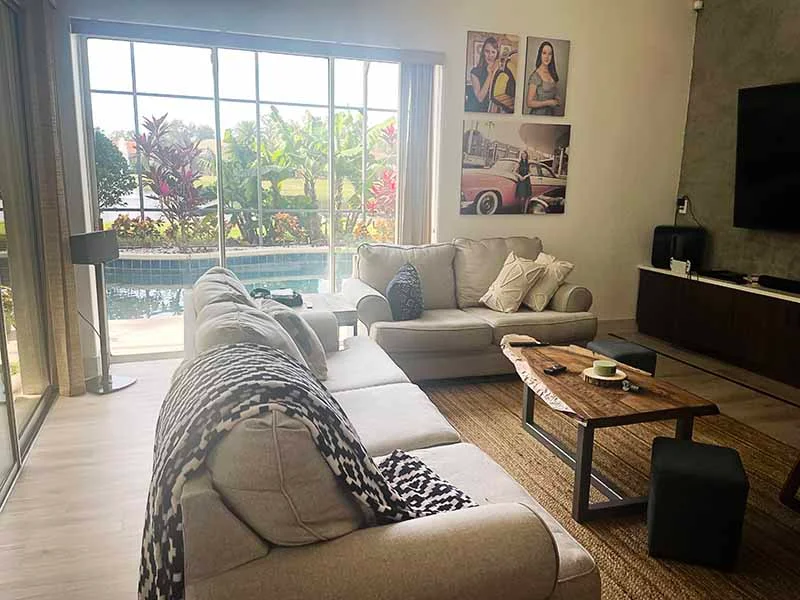
In the late afternoon, the sun beams through the windows, providing the most beautiful, even light you can imagine! But if I were to shoot here in the morning, my subjects would look tired and dull due to the lack of light. In the images below, I was standing in front of the windows, and she was facing me and the windows straight-on with backdrops about 2 feet behind her.
Using a 2.8 aperture, we were able to capture these portraits with a creamy background, letting in the maximum amount of light for the lens. To keep her images looking youthful, we didn’t add any contrast in post-production.
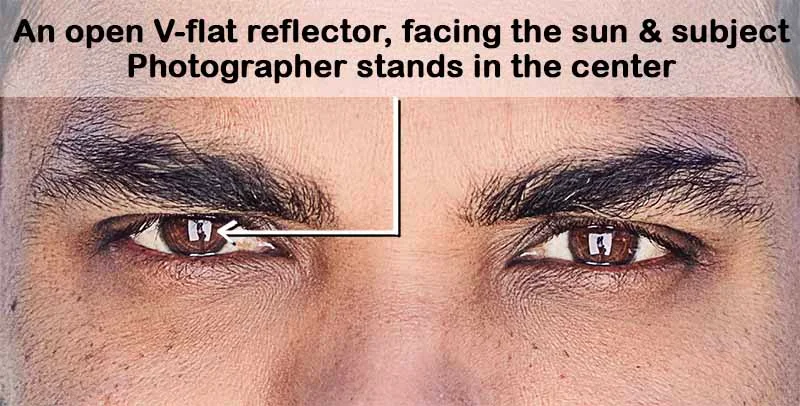
4. Bold Reflections
This type of lighting has earned the Rebellion Award for its bold look that just commands all kinds of attention! This rebellious method is our one exception to covering the head. It can be out in the wild, open yonder (or just on your street corner, which is where I usually am for this type of session.)
For this lighting to work, you will need:
– 1 V-flat reflector, or something similar, like 8′ foam insulation boards, taped into a V shape.
– You will also need to set up your backdrop on location with weights
– You will need to have a lens that shoots between 35mm – 50mm.
Other requirements for our rebellious-but-powerful lighting style:
– full sun
– low sun (golden hour)
– little to no wind
To achieve this look:
1. Set up your backdrop facing away from the sun, so your subject’s back is to the sun.
2. Set up your reflective V-flat directly facing the sun, white side toward the sun, about 6 feet from your subject (or less for a more powerful blast of light).
3. Stand in in the crook, or “V” of the V-flat.
4. Adjust for exposure and shoot!
In the session below, our subject preferred an outdoor backdrop. But if I had popped a backdrop up behind him, this would have doubled as a studio portrait!
Check out: The Definitive Hand Posing Guide For Portrait Photography
This is a very bright way to light your subject. Invite your subject to take breaks by closing their eyes, relaxing eyebrows, and then going for it for another set stunning of shots.
As you can see, natural light portrait photography can be done, simply by knowing how to harness the light in order to create shadows and dynamics in your portraits.
But what if you hoping to shoot at an alternate outdoor location, like a park? We can work with that! Just follow a few rules to keep the professional studio portrait look we’re going for:
– When finding an outdoor location, try to look for areas that have solid open shade or structures that can provide shade overhead. Open shade is natural shade that is not affected by direct sunlight. Bridges, architectural structures, and awnings are good examples of solid overhead shade that still allows in plenty of light at the “front.”
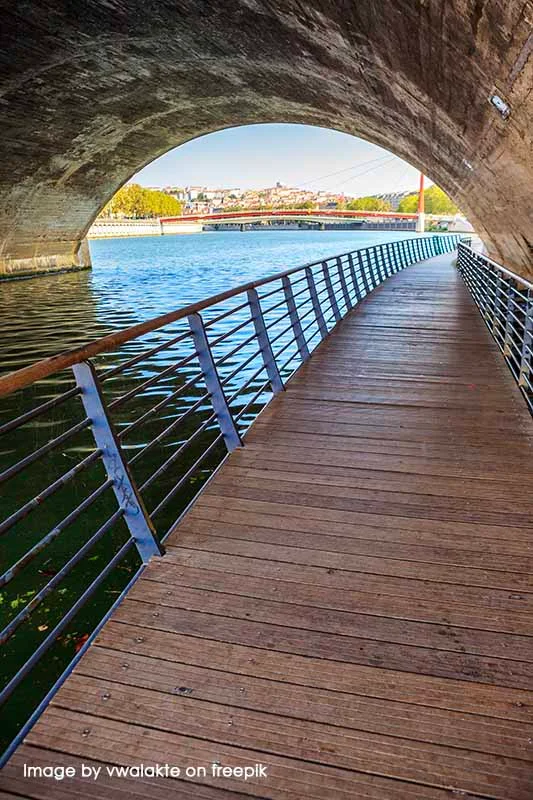
– Avoid using trees as your overhead shade – trees don’t block enough light and often have dappled best lighting for photography. For this type of natural light portrait photography, it is always going to be best when you have shade pretty directly over your subject
If you are unsure where to shoot, pick 2 or 3 potential areas you would like your portrait session to take place. Then visit each location during the morning, 2pm, and early evening to see if the sun will cooperate with your chosen location.
And just for fun, here are a few more natural light portrait tips to help your photos shine!
Tips For Natural Light Portrait Photography
Tip #1: Position your subject carefully for crafted, intentional shadows
Once you have found a suitable location, you need to consider how to position your subjects so that the light is telling a story. Sometimes, we want beautiful, flat light. But the most effective way to get a portrait studio look is to create intentional shadows, whether soft or hard. Experiment with angles and positioning your subject according to the direction of the light.
When positioning your subject, consider the direction of the light and the shadows it produces. Ideally, you should position your subject in an area where they are either fully or partially facing the light source, and are quite close to the light source, without uncovering their head from the structure.
Check out: Masterclass: Black & White Photography By Frank Doorhof
If there is simply too much light coming into the scene for shadows to have their moment (for instance, if you are under a bridge, but it’s a wide bridge and lets lots of light in and around your location), try narrowing your light source. You can re-position your backdrop and subject to a 45-degree angle against a wall, or try blocking light using V-flat reflectors.
Bottom line – embrace shadows! Shadows can enhance the most captivating parts of who we have the joy of photographing!
Tip #2: Bring a studio backdrop setup on location
This is one of the simplest ways we can get studio-quality portraits at any location – bring your backdrop on site. A great checklist of things to bring for your on-site photography would be:
– a backdrop stand
– a seamless paper backdrop
– a long fabric backdrop that is long enough to add weight to at the bottom
– a large collapsable reflector on a stand (or bring an assistant to hold your reflector)
– three sandbags: 2 for either side of your stand, and 1 for your reflector stand
– and of course your charged camera with lenses!
When your backdrop doesn’t look like the outdoors but more like something you might see in a studio, your images will automatically have a strong sense of professional studio portrait photography work.
Achieving studio-quality portraits using only natural light requires careful consideration of natural light quality and quantity. For example, knowing how to pick the best location, subject positioning for beautiful shadows, and camera settings.
Understanding these essential steps will create professional-looking portraits that capture the moment with ease. With practice, attention to detail, and the right equipment, anyone can create stunning portraits in natural light.
Natural light portrait photography is an art form that captures the beauty, intricacies, and emotions of an individual. While many photographers prefer studio lighting in photography setups, there is a unique charm to capturing portraits using only natural light. I hope you give it a try!
Author’s Bio
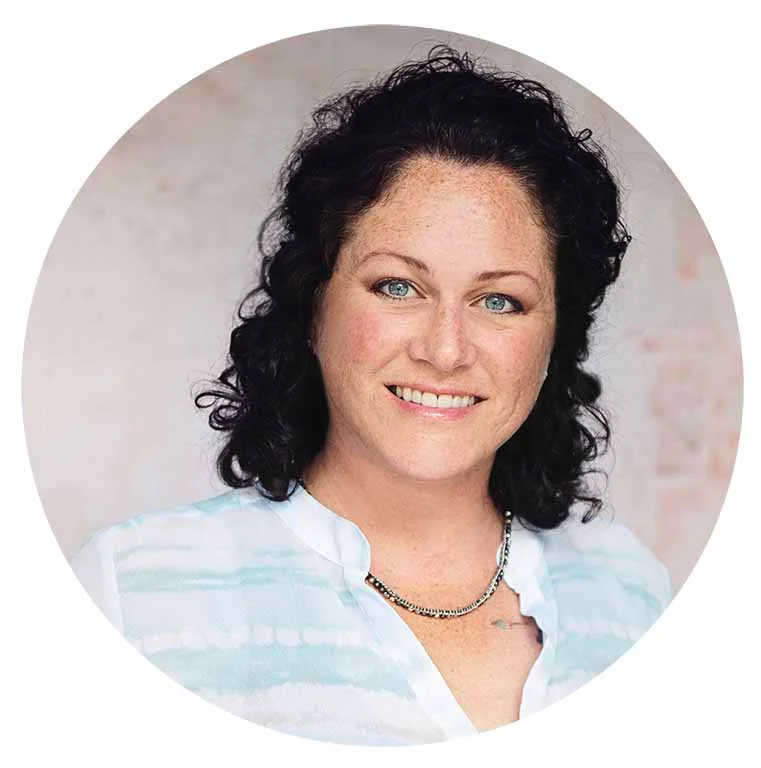
Eldeen Annette is a portrait photographer, specializing in headshots for professionals and for actors in Orlando, Florida. You can visit her work at her website.